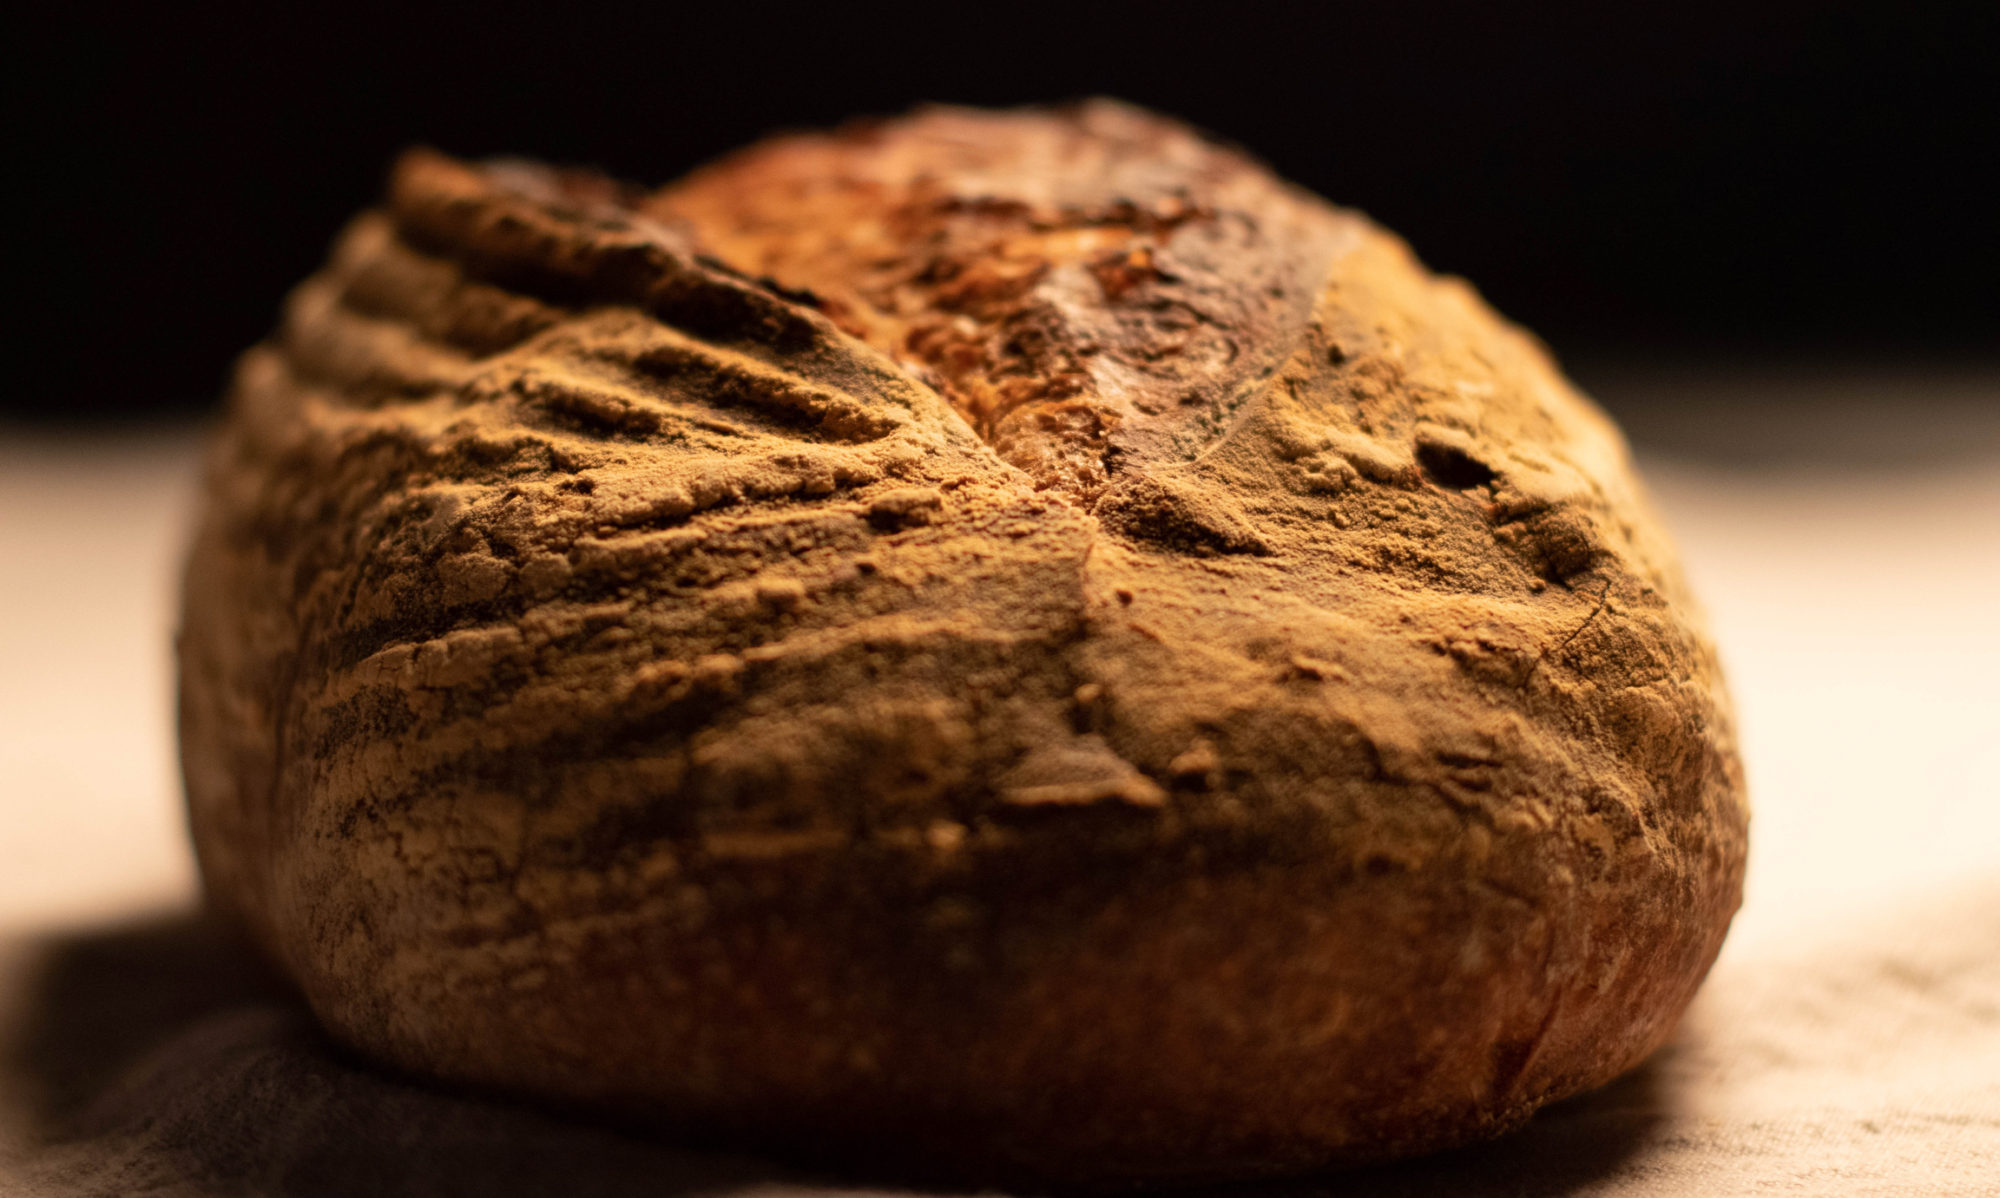
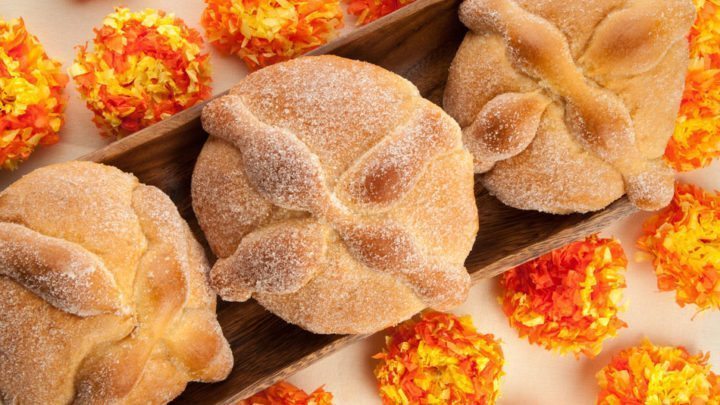
I’ve never actually baked it, and to be honest, until this morning I didn’t even know it existed. (I say that with a certain amount of shame). Pan de Muerto is a “…round loaf shaped like a skull” that is, as I understand it, commonly placed on altars for the dead during Día de los Muertos.
It was particularly interesting to see that article this morning as I have, for the last several days, been thinking about bread and memory, both personal and cultural. In the Jewish culture, the one that I know best, bread is central to how we remember who we are and where we came from .
The holiday of Passover centers around matzah, the unleavened flatbread over which we tell the story of the genesis of the Jewish people. At the Passover seder we wrap the long and complicated telling of our history around this most simple of loaves.
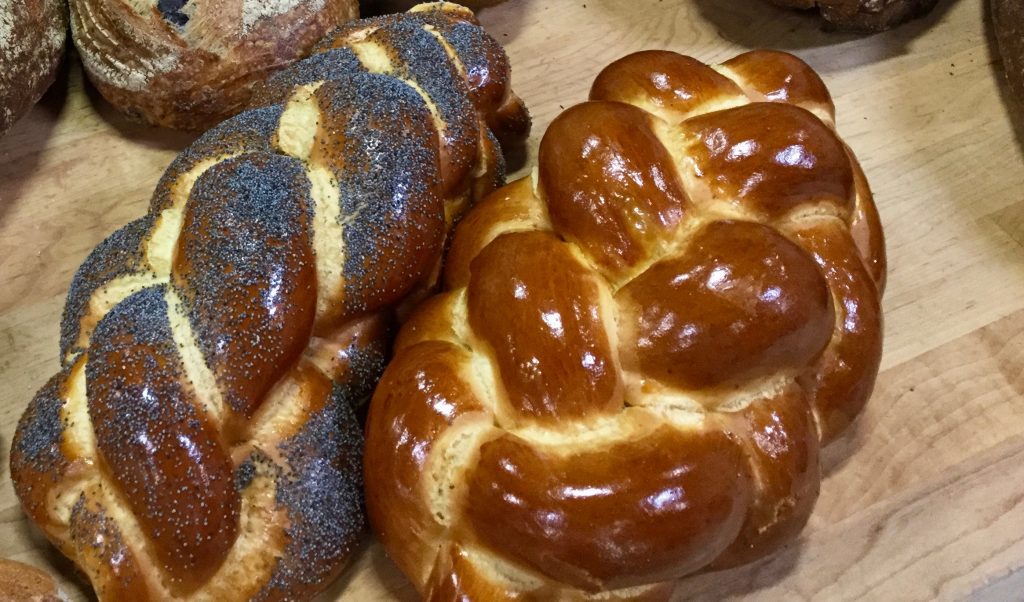
And there are other cultural connections. Every Friday night many Jewish families around the world bake Challah. There are a whole world of different recipes, yet each family makes a loaf that connects them to their ancestors back through the years. I strongly remember, when I was at the early stages of deepening my Jewish practice, that I was holding the two loaves over which we say a blessing on Friday night, and the strongest sense came over me that this simple blessing over these two loaves connected me to my grandparents, and their parents, and their parents, and on and on back and back to…the matzah baked when leaving Egypt, or the pita that my Syrian great, great, great, great grandparents blessed and ate at their Sabbath table.
Every time I go into a proper bagel shop (this is usually in New York, even though I believe that it is possible to make a decent bagel in other places), the smell reminds me of the many times I’ve stood in line buying bagels for family and friends. It also reminds me of going into a bagel shop with my father when I was a little kid and him telling me that the smell reminded him of the bagels of his youth.
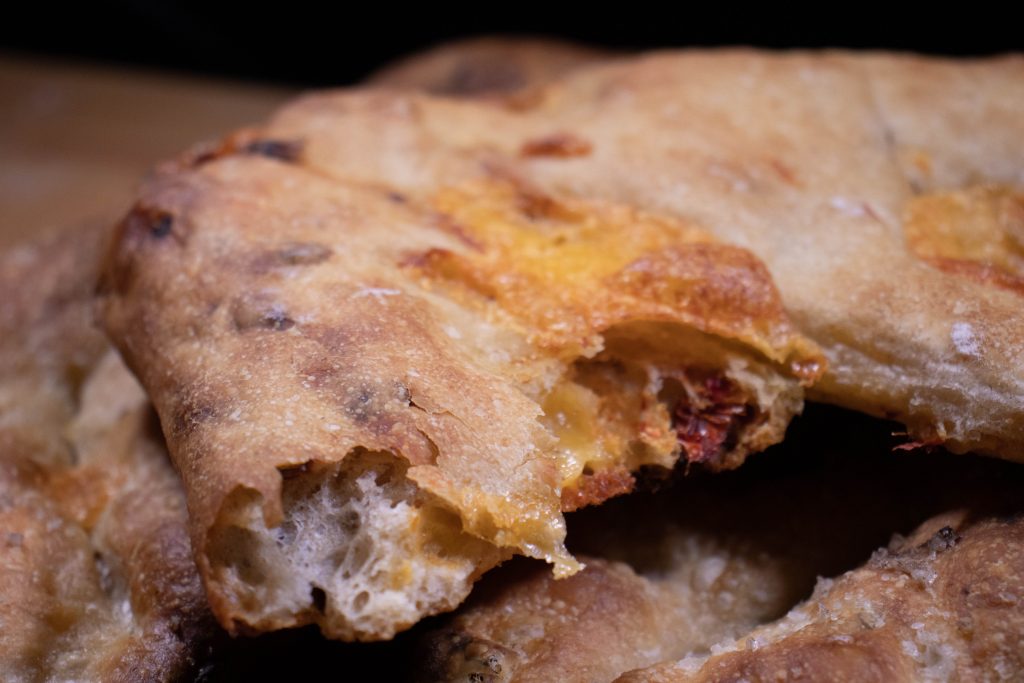
Connections. It is one of the amazing things about food, and breads in particular. A croissant can remind you of a particular breakfast in bed 30 years ago, and a loaf of cranberry bread can remind you of celebrating holidays with people who are no longer with us. Or the drives my wife and I took when we first moved to Sonoma County, stopping at Wild Flour Bread for a loaf of their cheesy fougasse on our way to the ocean.
And a loaf of Pan de Muerto can connect you to ancestors who are gone, and yet not gone.
I think this is why they say when you are selling a house that you should bake bread before showing a house. The smell, they say, will make a house feel like a home. And no wonder, the smell and taste of bread can connect us to our memories, and histories like few other things.
These are some of the bread memories – both personal and cultural – that I have. What are yours? I’d love to hear of the cultural and personal connections that you have when smelling or eating bread.
Image from: https://www.wideopeneats.com/recipes/pan-de-muerto/ – (Let me know if you don’t want me to use it)
I’m looking online at a list of great bakeries around the country. Not for any really good reason. Sometimes I just like to look around and see what people are up to and see if any good ideas pop into my head. It’s usually a nice way to pass some time.
But today, deep down, almost below perception, I feel a rant welling up inside of me. I want to keep it down. I try sucking on ice chips and drinking something bubbly and taking deep breaths, but it just won’t stay down.
Here it comes…
Why is it that in the descriptions of all of these bakeries, they are praised for making some fancy-ass bread?
“Beer-infused Olive Bread” “a white boule studded with Callebaut chocolate chunks” “Multi Grain covered with rolled oats and the Cherry Pecan” “Rosemary-Meyer Lemon bread” “Asiago Parmesan Cheese Bread”
Doesn’t anyone just make plain bread anymore‽
Of course they do. And I’m sure all of these bakeries also make amazing Baguettes, Sourdough or Rye loaves. But it makes me wonder, what is this obsession we have of making a whole meal in a loaf of bread, or making something fancy and shiny, instead of simple and perfect? How come, no matter how spectacularly a baker pulls together simple ingredients, carefully measures time and temperature, mixes it with patience , attention and care to create a spectacular loaf that makes your heart sing, people are still more impressed by an ordinary loaf of olive rosemary bread?.
A simple, perfect loaf is incredibly difficult! To wow people with sparkle-berries and chocolate star-chips is easy. It’s the baking version of the photographer Lord Snowdon’s quote, “if you can’t make it good, make it big”.
Why should I make Olive Cheese bread? A perfect, simple loaf, you can eat with whatever kind of olives and cheese you want. Why should I make a chocolate baguette when you can eat a beautiful, plain baguette with whatever delicious chocolate you have around?
As you may have guessed, I’m a purist. Not just in baking, but in most things. I prefer a guitarist who can play one beautiful note to one who can play blindingly fast. I prefer a painter who can tell a story with subtle color choices to one who has so much going on that you don’t know where to look. I also prefer a baker who puts all of their energy into making a simple, beautiful loaf.
…and I hope you disagree with me completely. Because here’s the truth. The thing that’s going to make you a great baker – or musician, or sculptor, or whatever your medium is – are different from the things that work for me. Your art – and I believe bread along with the other food arts are every bit the art that music or painting are – is going to be great because it’s an expression of who you are and what your tastes are and what you believe. The passion to rant about some subtle distinction of color or flavor to friends and strangers alike, is also the passion that will inspire you to work to perfect your vision. Perfecting your vision and putting it out there is what it takes to be successful in any of the arts.
It’s the delightful paradox of art: different people can take completely opposite ideas and make great art out of them. So, as much as I want to rant about fancy-bread, I also completely concede that there are some bread-artists out there making amazing fancy bread. That’s their art; it’s not my art.
To be both artists and good citizens of an artistic community we may have to live in tension between knowing we are absolutely right about something, and knowing we are absolutely wrong about that same thing. As my great teacher, Jonathan Omer-man used to say, part of the spiritual journey is the ability to live in paradox. Being an artist can also be a spiritual journey, if you want it to be (and sometimes even if you don’t).
Or you can just make a great loaf of bread.
Finally, a confession: I love to make olive cheese bread sometimes. While it kind of goes against my purist notions, sometimes it’s just what I want to make and eat. And more importantly, my wife loves fancy bread.
When we first moved to Sonoma County in the early aughts, my wife and I used to drive out to the coast on Sunday mornings and take long walks along the beautiful, rocky, Northern California coast. On our drive out we would stop at Wild Flour Bread in Freestone (wildflourbread.com) and pick up at least one loaf of their beautiful, cheesy, fougasse to eat at the beach. We would inevitably devour it in the car on our drive, arriving at the coast covered in crumbs, with big smiles on our faces.
There’s a time and place for a fancy loaf, and I’m glad someone is committed to baking them.
What’s my point? That’s often a good question with me. I guess it’s that I hope that while you’re pursuing your vision and passion for your art, that you don’t get so locked in that you can’t see and try other things. Maybe you’ll learn something, or at least have a nice lunch.
The sourdough backlash has begun. Countless people who began their quarantine by making a starter and delving into the world of bread baking are now turning their backs on their starters, tired of the daily chore of feeding and caring for their new pet. With yeast hard to find, this is a good time to delve into the world of unleavened bead.
…which works out well for me as I had been planning on doing some matzah recipe testing after Passover anyway.
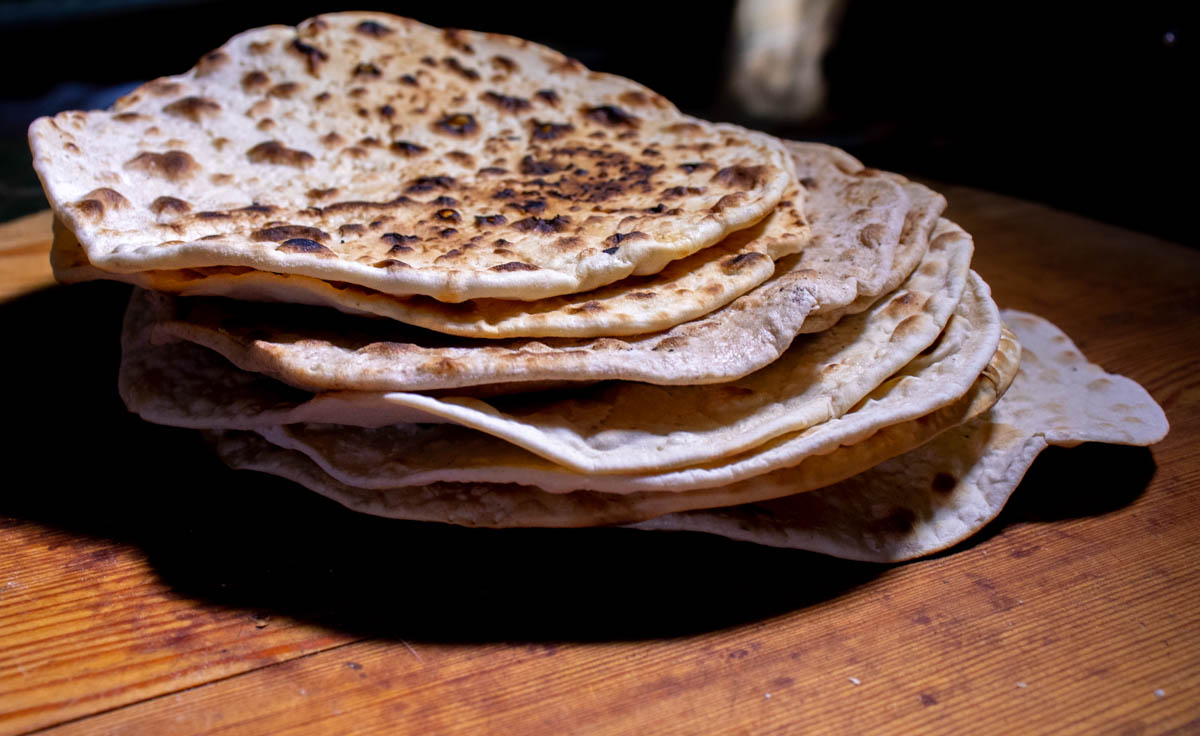
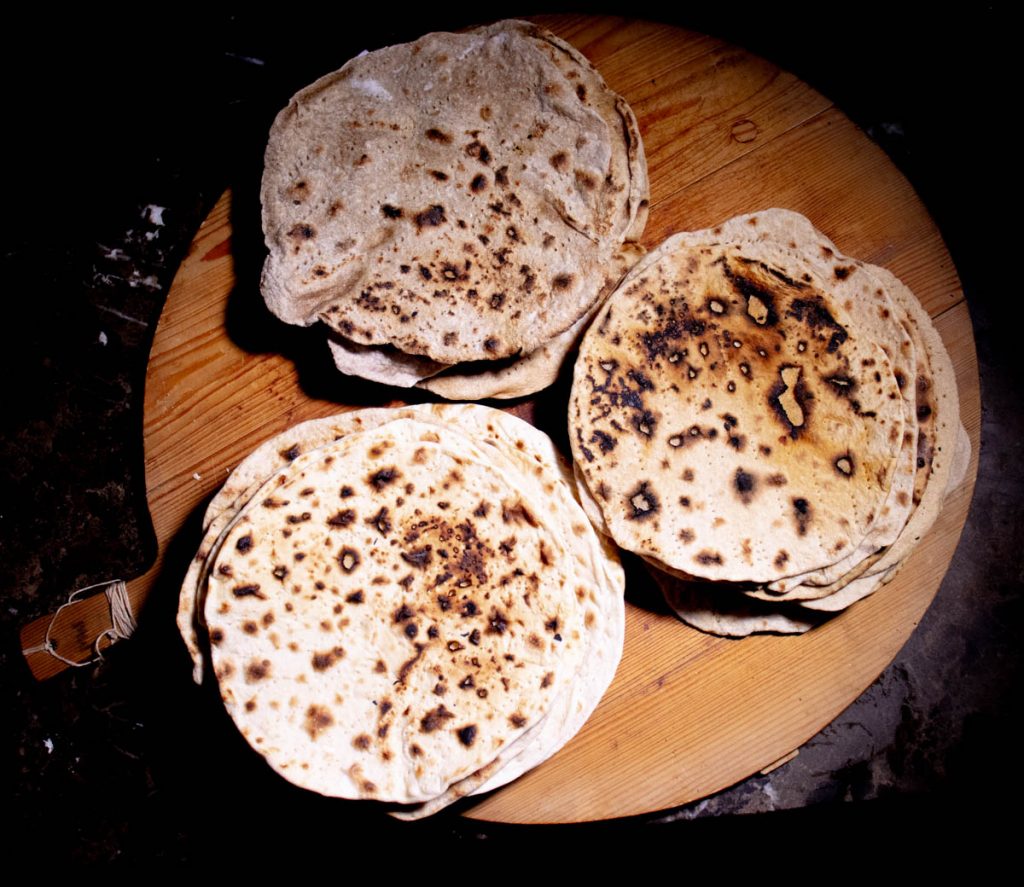
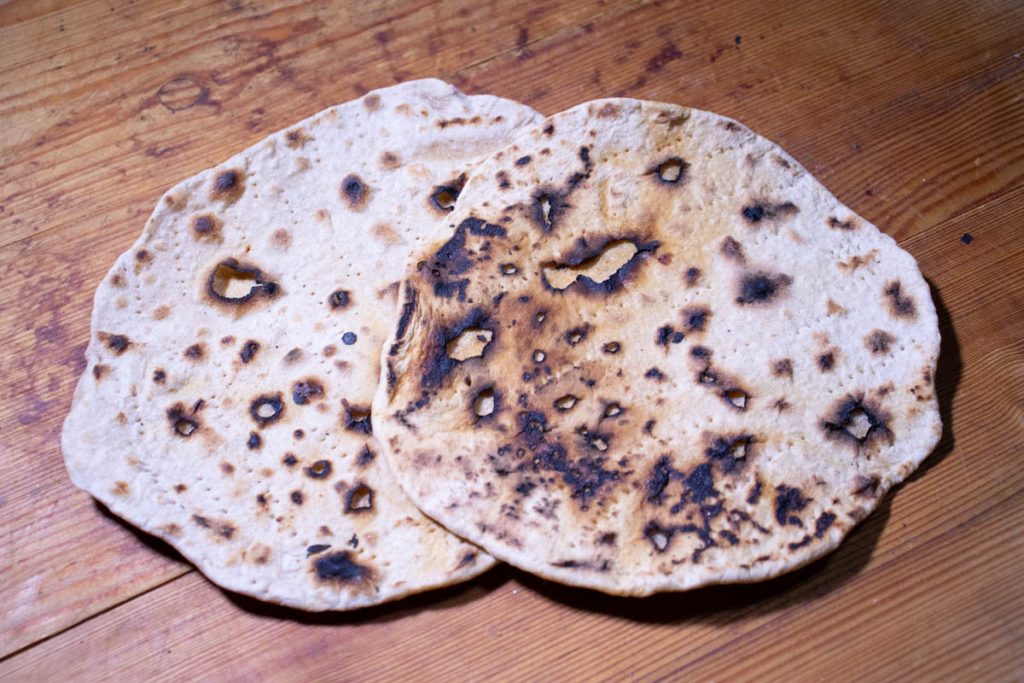
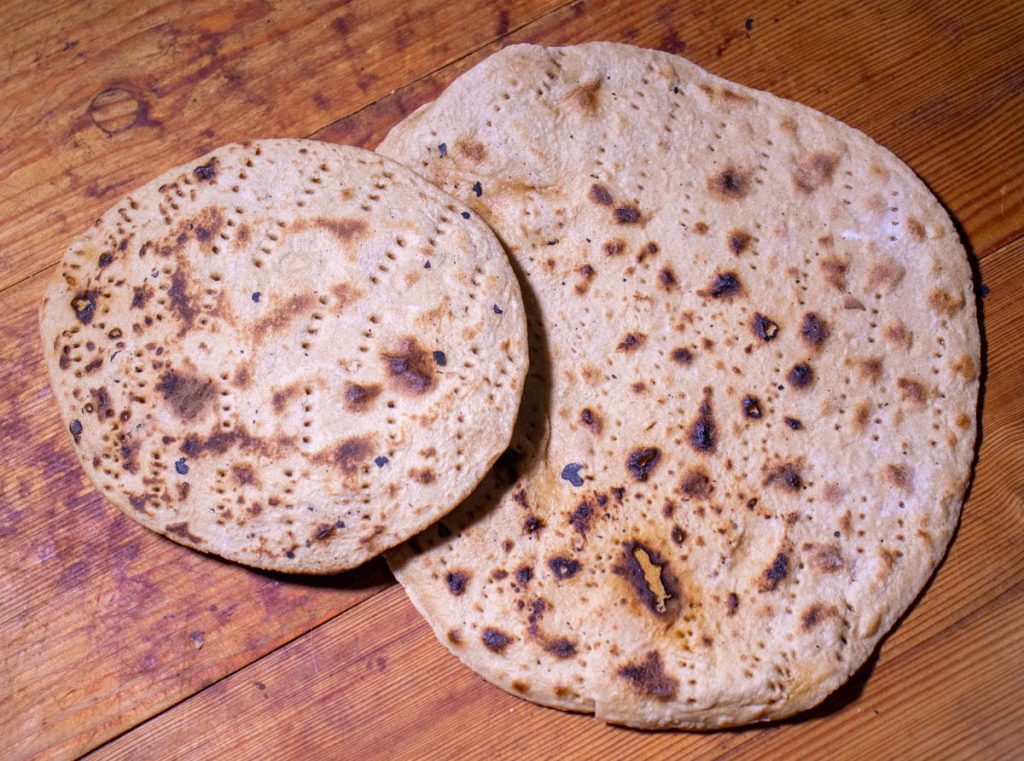
A good day’s work testing matzah recipes.
Thinking Outside The Box This whole matzah baking enterprise resulted in a real change in my thinking about matzah. I grew up in a square-matzah world. Until about 15 years ago, I didn’t know there was any matzah other than the flat, dry, square, white kind that came in a box and never goes stale. Fifteen years ago I was introduced to the big, round, hand-made, whole wheat “shmurah matzah” that many communities use at passover. This was a matzah revelation, one that has been sustaining us at Passover ever since.
Now don’t get me wrong, I love the square, cracker-like matzah, and we eat a lot of it throughout the year. But not knowing that any other kind of matzah existed was like loving bread, but thinking that white loaf bread was the only kind of bread that exists.
As it turns out, that hard, square, machine-made matzah that I grew up with is only a couple of hundred years old. (The actual matzah I ate wasn’t a couple of hundred years old, just the process). Because it’s cheaper to make and incredibly shelf-stable, it quickly replaced hand-made matzah throughout much of the Jewish world. The now obvious truth, that was a shocker to me, is that for most of history matzah was soft and bread-like, rather than hard and cracker-like. In fact, there are many communities that still eat soft matzah for Passover.
Why then, I ask myself, am I only eating the hard cracker-like matzah when I could be eating delicious soft-matzah?
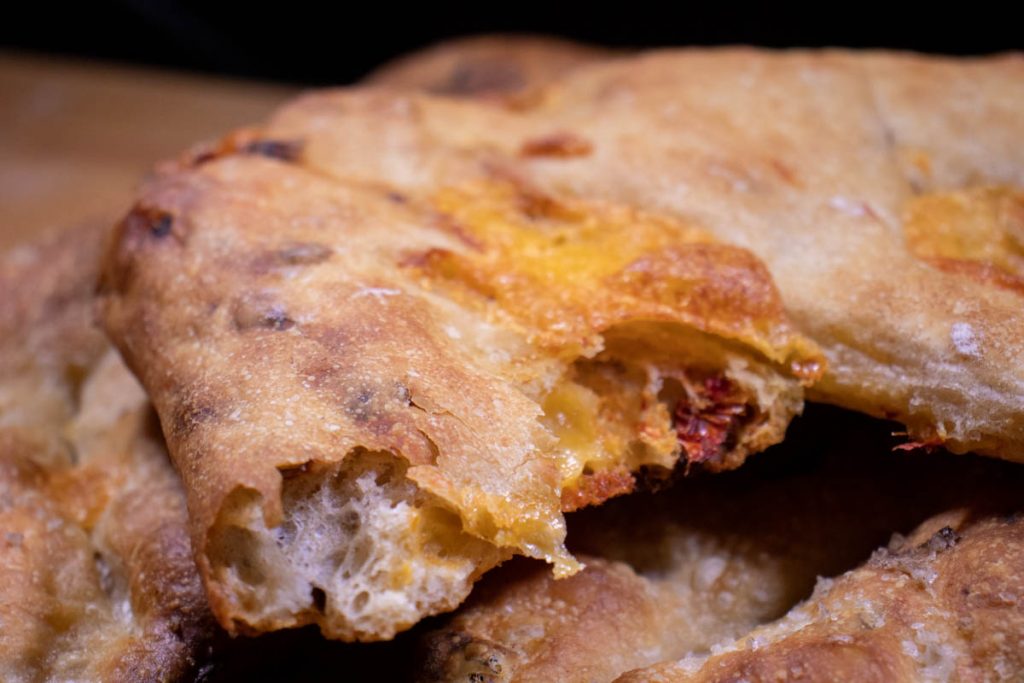
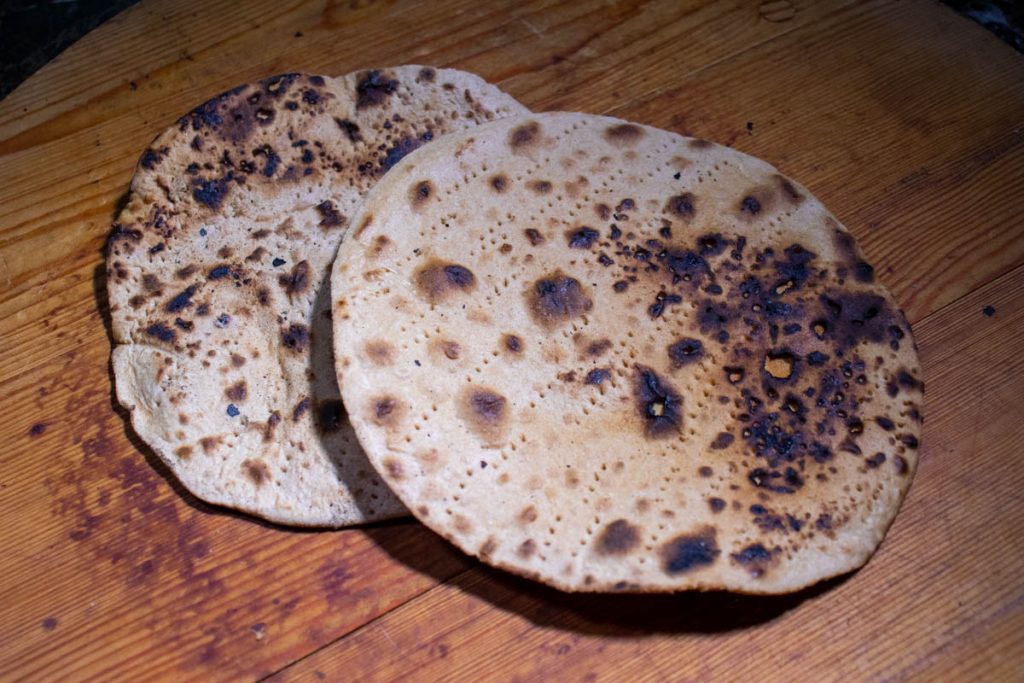
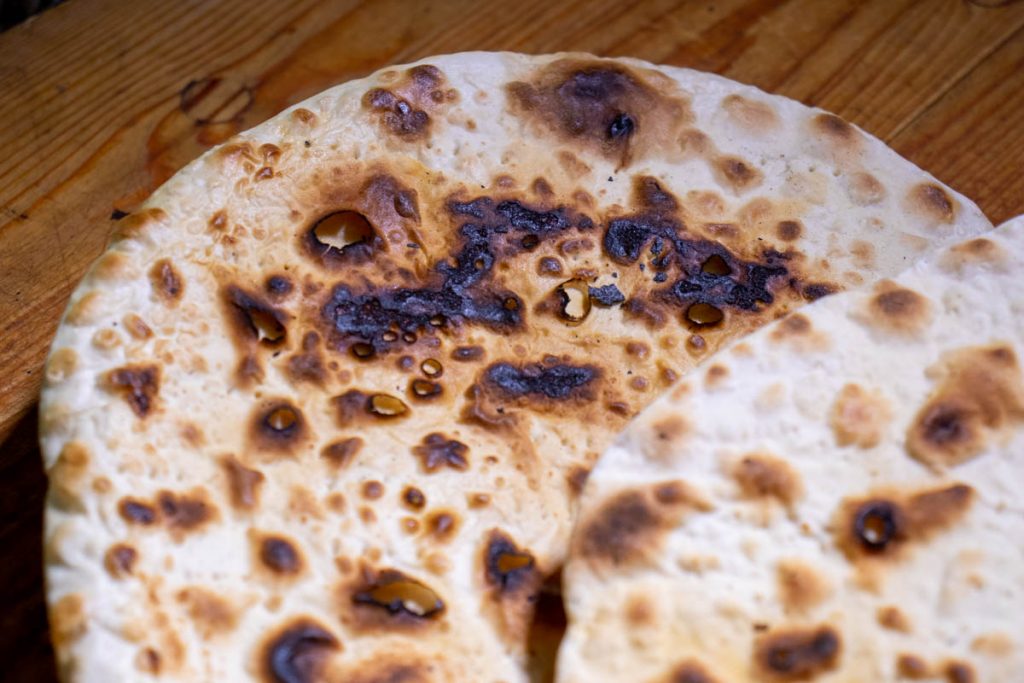
Soft matzah. Not the stuff I grew up with.
A word of caution, if you care about Jewish Law There are lots of reasons NOT to make your own matzah for Passover. As this is a bread blog and not a blog about Jewish law, I’m not going to go into it. I will simply say, if you think you might want to make your own matzah for Passover, please check with your Rabbi before you do it.
You Learn Something New Every Day Making my own matzah was eye opening. It turns out that baking a simple flatbread is a great way to see some basic things about bread baking without quickly and simply. What difference does a change in the formula make, both in terms of the workability of the dough, and of the final product? For example, how is a 50% hydration dough different from a 90% hydration dough? What happens when you add oil or other fats to dough? How do you do the basic math to create or change a recipe? It doesn’t tell you everything about how those same changes will impact a sourdough or other leavened loaf, but for new bakers it’s a great way to start having the conversation. Even for experienced bakers it’s an interesting way to look at simple things like hydration and salt in a very pure way.
From now on, the first bread I bake with students new to baking is going to be matzah, or some other basic, unleavened flatbread.
Building a Recipe Originally I planned to find a couple of recipes, test them out, and then use the best of them. As I perused my baking books and the internet I realized that matzah recipes are all over the map. Recipes for both crisp and soft matzah had ratios everywhere from twice as much flour to water, to five times as much flour to water. Not much help. The two cookbooks I trust the most – Claudia Roden’s Book of Jewish Food and Jessamyn Waldman Rodriguez’s The Hot Bread Kitchen – had recipes that were so wildly different that I decided to just create my own recipe from scratch a la Cooks Illustrated.
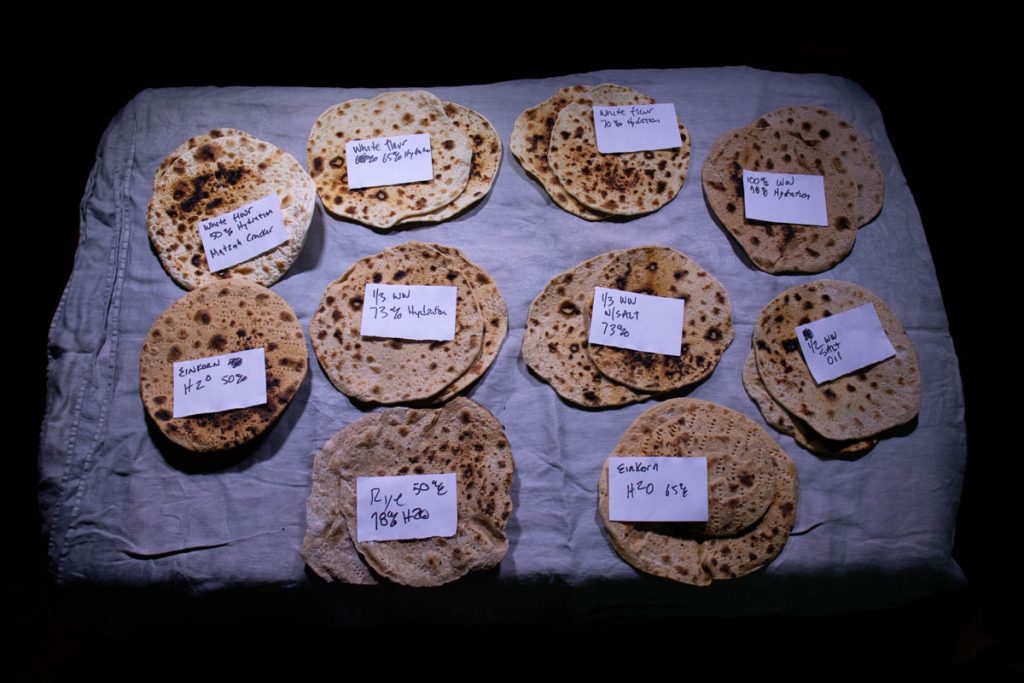
I decided to start with a basic concept of what is the essence of matzah. Then I’d choose a starting place based on all of the recipes that I had read, and what I know as a baker, and I’d work from there to try to make my best matzah. Because I’d never actually baked matzah before, my idea of what I was going for changed while I was working through the process. By the time I was done I had made 10 different versions of matzah. (Eleven, actually, but one was so bad I don’t want to talk about it). There were definitely winners and losers (aren’t there always), but I feel like I now have some good matzah recipes to make throughout the year, and at Passover, if I’m brave enough.
What Makes Matzah, Matzah Matzah exists on two planes, the technical and the aesthetic. Technically, for a flatbread to be matzah it needs to be completely unleavened. If I had to guess, I would say that what this originally meant was that you they didn’t add sourdough – which was what they used to make bread rise before commercial yeast existed. However, according to Jewish Law, the way we determine if matzah is completely unleavened these days is that it needs to take less than 18 minutes from the moment that the water touches the flour until the bread is in the oven.
The aesthetics of matzah are another story. Like most other things, I’m sure each person has their own vision of the perfect matzah. For my taste, matzah should be simple. For Passover it’s just flour and water, and for the rest of the year I’ll add a little salt, and that’s it.
Whatever you may be eating on your matzah, the matzah itself carries a deep cultural flavor that needs to come through. It is the bread of freedom – that the Jewish people ate in the wilderness when we were liberated from slavery. And it is also the bread of slavery and affliction that we ate when we were enslaved. It is the afikomen – the broken and hidden piece of matzah – that many of us searched the house for at the end of the Seder when we were kids. It is the memory of every seder we’ve ever been to, and all of the family that were there with us, and all of our ancestors at their Seders. It holds the flavor of the joys and trials of the Jewish people throughout history. In order to hold that history, it needs to be simple and pure.
So, that’s my goal. To make a simple, unassuming, unleavened flatbread, that you can make from water to oven in less than 18 minutes.
To find my matzah I tried different hydration levels (the amount of water relative to flour), and different flours and flour mixtures, and with and without salt. Some recipes I looked at added a little bit of oil, which I have to say made for a slightly more complex taste, and a slightly softer and more flexible matzah. Those are usually things I like in my bread, but for matzah I decided to stick to the simple and pure which was closer to my vision of what matzah should be.
There wasn’t just one matzah recipe that I liked. As it turns out, I like matzah both cracker-crisp, and soft and flexible, and made with different flours. Following are several recipes for different matzah that I really liked.
One of the things I really liked about this dough is that it’s very flexible and quite easy to make adjustments to. So, I highly recommend that you give yourself the freedom to play with these recipes to find the matzah that is both delicious to you, and that, perhaps, connects you to your past.
A Note on Baking Matzah Most of the recipes that I looked at had you bake matzah in a hot oven on a pizza stone or pre-heated sheet pan. I decided instead to use a cast iron pan on the stovetop.
My reasoning for this was culinary, historical and practical.
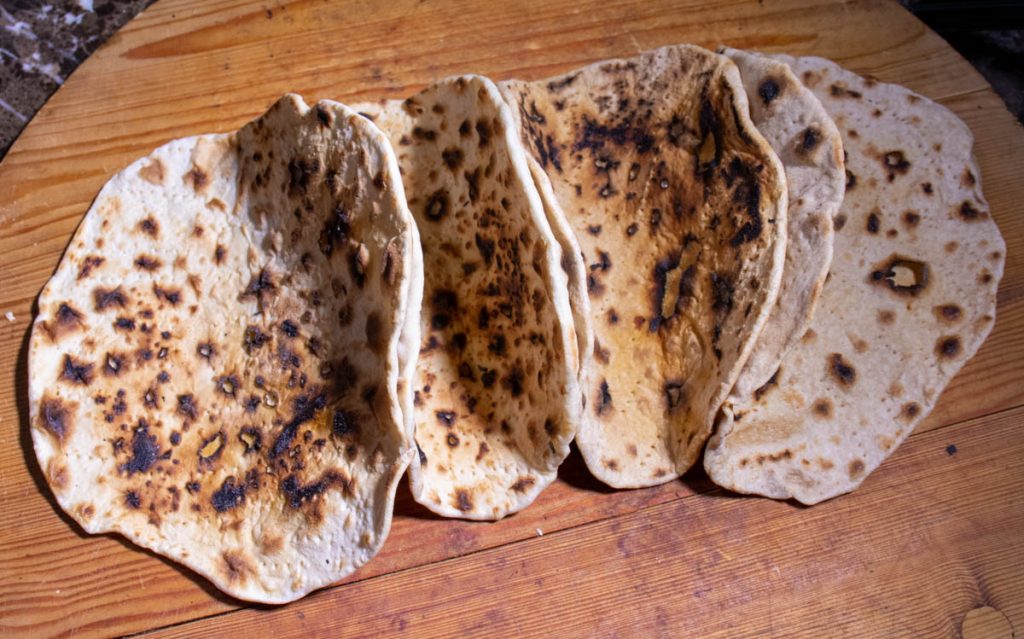
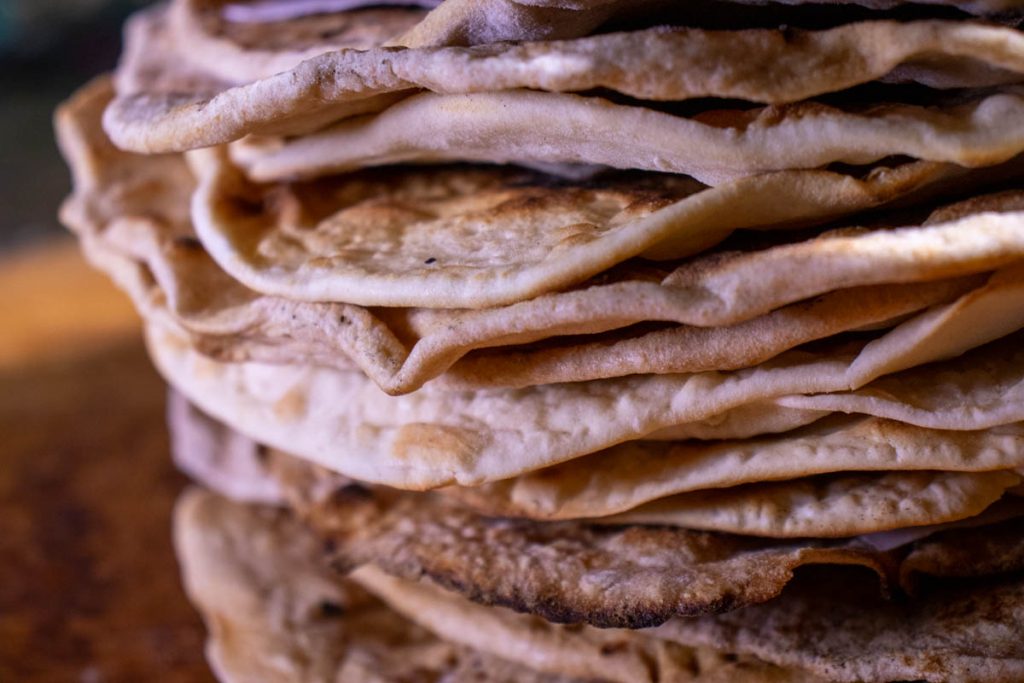
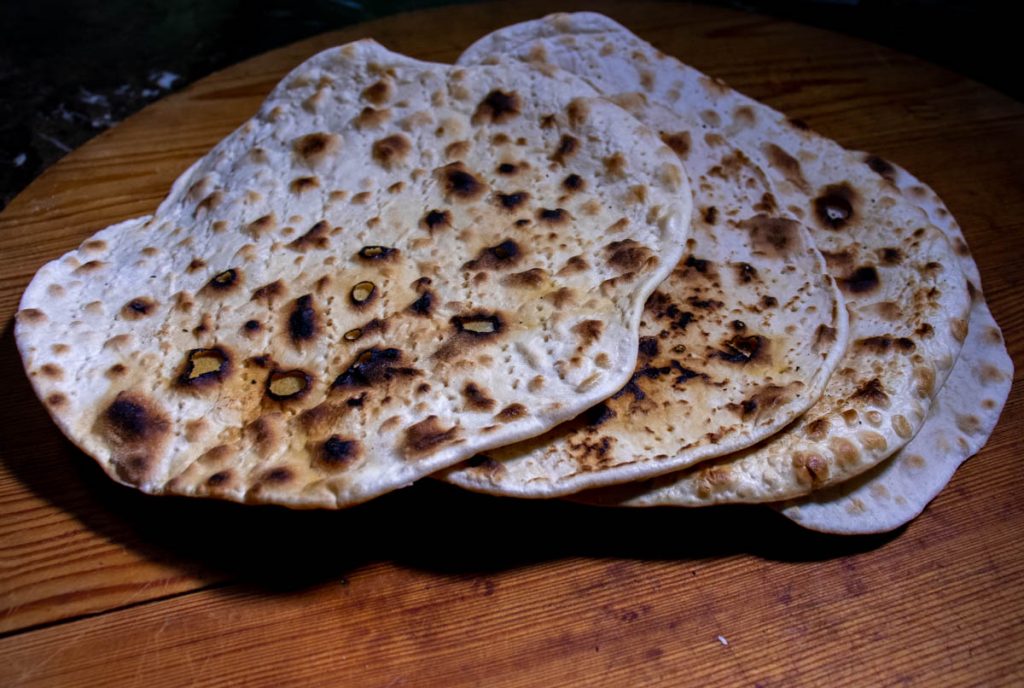
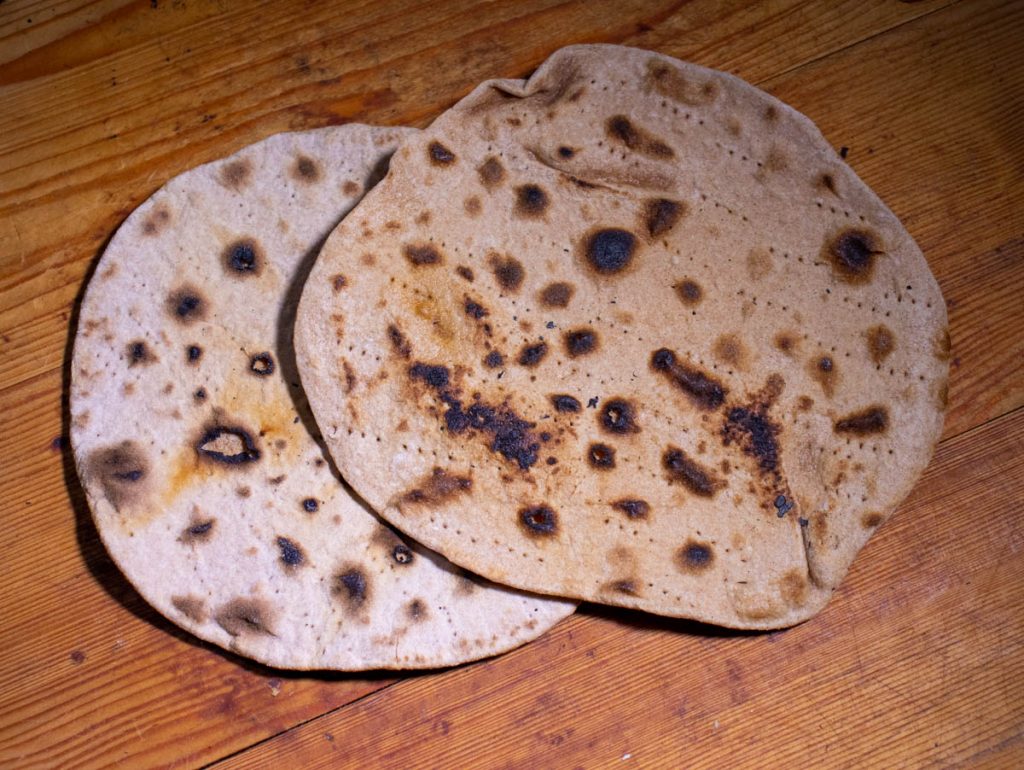
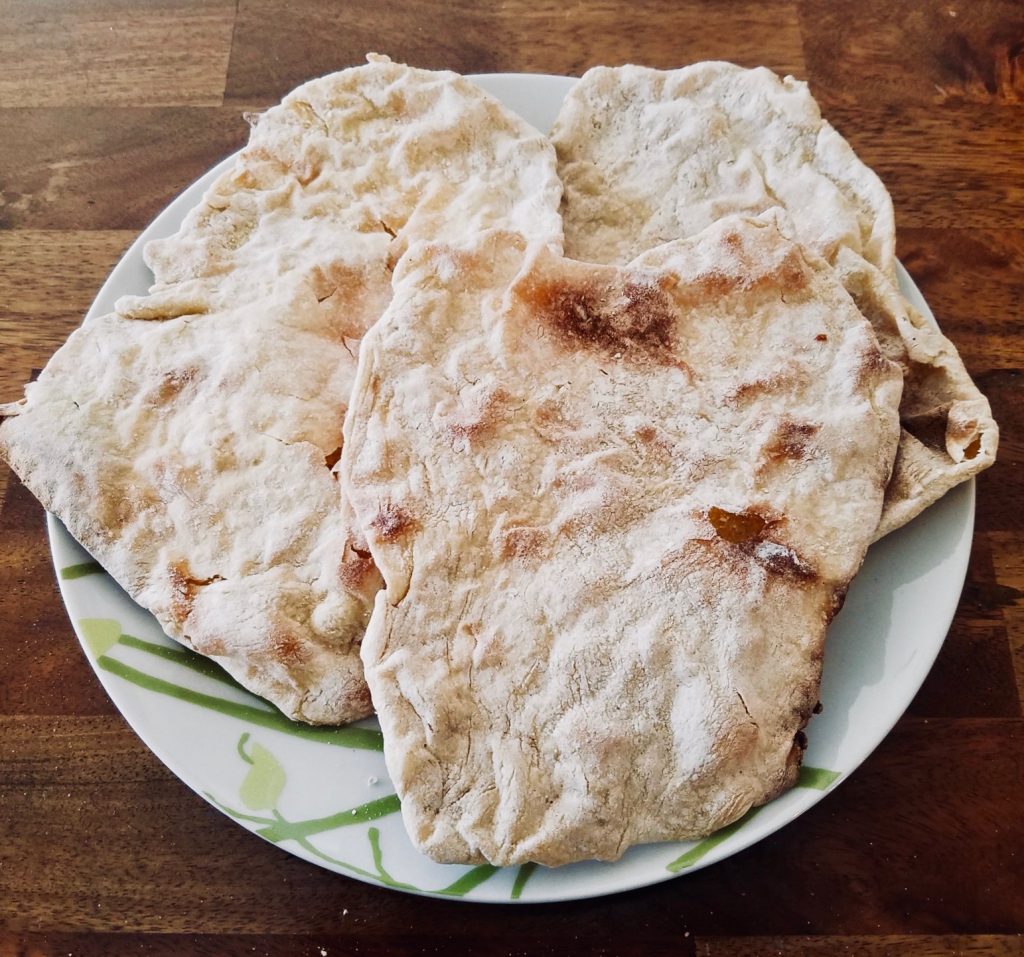
The main reason I decided to cook on the stove-top was that my vision for matzah, especially the soft matzah, is like that of other tribal breads that are baked in a tandoor, or on a saj, or just on a hot piece of metal over a fire. Cooking it this way allowed the bread to remain soft and supple, while also having crispy burnt spots.
That being said, if what you’re after is a crisp cracker-like matzah, baking it in an oven will dry it out more and may give you more of that crispy crunch you’re after.
This was the bread that the Jewish People at while they were fleeing Egypt. It seems unlikely that they were fleeing with huge bread ovens. More likely, they baked their matzah on metal or stones that were heated over fire, as is still the practice for many cultures, especially cultures with a nomadic history (or present).
Finally, if you are going to bake matzah for Passover, you will need to have whatever you cook your Passover matzah on be set aside just for making Passover matzah. This is much easier to do with an 8″ cast iron pan than it is with a whole bread oven (though people do have ovens that they keep separate just for passover).
The Recipes Let’s start with the instructions, which are the same for each of the matzah formulas.
Preheat your cast iron pan. I used a Lodge 8″ skillet. Preheat it for at least 10 minutes to make sure it’s nice and hot. The place that I did this recipe testing has a pretty weak stove, so I pre-heated it to high. If you find that your matzah is burning more than you like before it’s cooked, try lowering the temperature of the pan. If you are going to bake these in the oven, pre-heat to 500 degrees with either a pizza stone, or a sheet pan in the oven.
Measure out your ingredients. dry ingredients in one bowl, water (and oil if you’re using it) in another cup or bowl. Because you are going to be on the clock (remember, these need to be done in 18 minutes), you really need to have everything ready to go before you start.
Start your timer. If you care about making these in 18 minutes, start your timer just before mixing the water with the flour.
Pour the water into the flour and knead quickly until you have a uniform ball of dough, maybe two or three minutes.
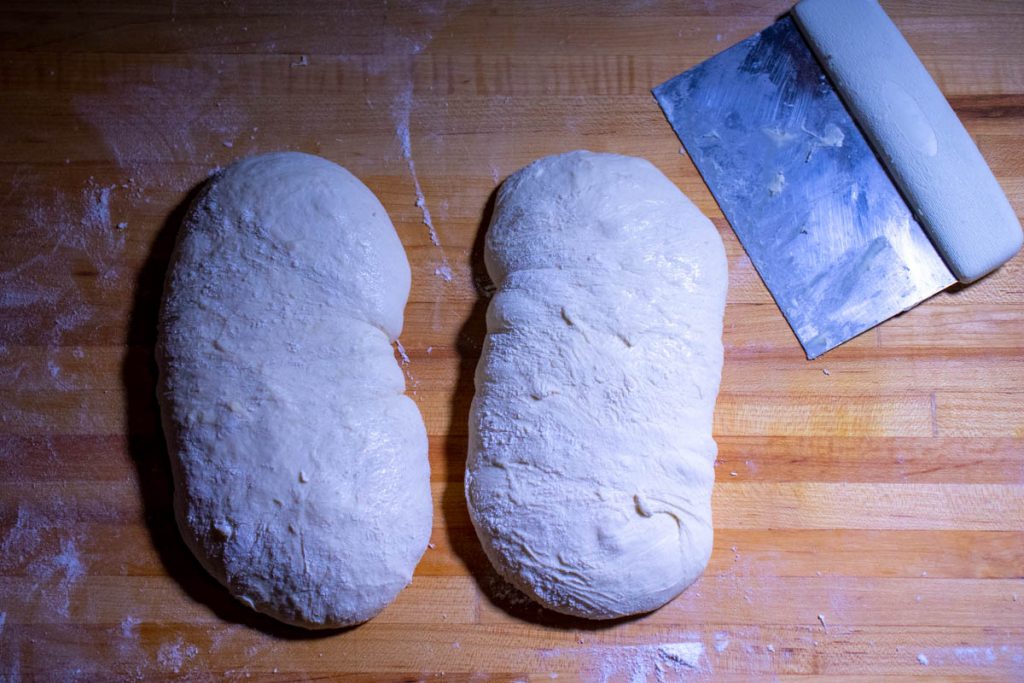
Separate the dough into 100g pieces and roll into balls, which should be three per recipe. The balls are about the size of an egg.
Flatten one of the balls with your hand on a well floured surface. Then, using a rolling pin, roll out to a 2mm thick round. (A little thicker than a penny). While rolling out the dough, lift it from time to time and make sure that it’s well floured so that it doesn’t stick to the counter. If you prefer, you can also roll out onto a sheet of parchment which may make it easier to move to the pan or oven. It’s a lot like rolling out pie dough.
Prick all over with a fork. This is to make sure that the steam that is created when it starts to cook is released to it doesn’t puff up, which is the antithesis of matzah.
Lift the first piece off the cutting board into the pre-heated, unoiled, pan, making sure that it is flat in the bottom of the pan. I just picked up the pieces of dough with my hands, but you could also lay it over the rolling pin like pie dough, or roll it out onto parchment and then flip it over onto the pan.
Bake on each side until it is browned the way you like it, with dark burn spots, about 2 minutes on a side. If you are trying for a more cracker like matzah, you may want to bake at a slightly lower temperature for a little longer to dry it out a little more. Or, perhaps, you can just put it in a warm oven after it’s cooked to dry it out a bit more if that’s what you’re going for.
Remove from the pan and place between two dish-towels (or one folded over dishtowel) for soft matzah, or place on a cooling rack for matzah crackers. The towel keeps the matzah from drying out as much as it cools, which is what you want for soft matzah.
While the first one is baking, roll out the other balls so they are ready to pop into the pan as soon as the first one comes out.
Working fast, but not crazy-fast, I was able to make three matzot (the plural of matzah) by myself, in one cast iron pan, per 18 minutes. If you have more pans and/or more people, or, I suppose, are much faster than I am, you can do more.
The following formulas will make three matzot per batch. Obviously, if you want to make a larger batch just double or triple the recipe. Or, you can break out your fancy bakers math and remake the recipe for whatever size you want.
Note 1: If you can, get a scale. It’s really hard (read: impossible) to make consistent and reliable measurements using cups and tablespoons. If you really want to use volume measurements, King Arthur Flour has a very handy conversation chart that you can use to convert the recipes.
Note 2: Your situation in terms of humidity where you live, and the temperature of your pan, and any number of things may be slightly different from mine. Feel free to make adjustments to these formulas if they seem too wet or dry or like they’re cooking too fast or slow.
The Formulas Each of these recipes make 3 8″ matzah. I have listed both the weight in grams, and the bakers’ percentage. These are all pretty robust recipes, so feel free to play with them.
If you are not making matzah for Passover, I recommend adding some salt to your recipe as it greatly enhances the flavor. (If you are a person that likes plain, salt-free matzah, you probably already know that about yourself).
100% Whole Wheat Matzah
I was surprised that this was recipe that seemed most suited for a soft matzah to use at Passover. It has a deep matzah like taste, and a lovely chewy texture, while still being a little crispy on the outside.
Whole Wheat Flour: 171g (100%) Water: 133g ( 78%)
If you want to add salt to this, or any of these recipes, add about 2.2% salt, which is a little less than 4g.
White Flour Matzah Cracker
This is a dry, cracker-like matzah that’s reminiscent of the square boxed matzah (which, as I mentioned, I really like). In the possible Seder where I make my own matzah, I would probably serve both this and the 100% Whole Wheat to cover all of the matzah bases. This dough is kind of dry and crumbly at first, but it will come together with a little bit of kneading.
Bread Flour: 203g (100%) Water: 101g (50%)
White and Whole Wheat with Salt
We eat matzah all year round. This version gets my vote for everyday matzah. It’s super simple to bake on any evening you want some bread and don’t want to spend more than 18 minutes getting it ready. The addition of salt makes a big difference in the flavor.
If you want to try adding olive oil to this recipe, add around 9g and see how you like it.
Einkorn Matzah – The Real Thing
Einkorn and Emmer wheat were likely the varieties of wheat that the original matzah was baked from. As I have Einkorn on hand and can’t get Emmer at the moment, that’s what I used. Einkorn has a beautiful, soft nutty flavor that really comes through in these matzah. Usually Einkorn uses about 1/3 less water than white flour, but that doesn’t seem to be the case here.
Einkorn Wheat: 185g (100%) Water: 120g (65%)
50% Rye Matzah
I tried this just on a lark and really liked it. The dough was a bit of a sticky pain to work with, but the resulting matzah had a really rich flavor, and, probably because the dough was sticky and harder to roll evenly, had a great mix of soft and crunchy bits.
Adjustments If you want to play around with these recipes to find the perfect matzah for YOU, these are some of the things you can play with. It’s a very forgiving dough, so even things that aren’t perfect are pretty good. (Not like a sourdough which, when it doesn’t work, really doesn’t work). – Thickness: Try rolling the dough a little thicker or thinner. – Hydration: Change the amount of water you use in the recipe. – Flour mix: Try making matzah out of different kinds of flour, and mixing them in different proportions. – Bake time and temp: Longer and slower as opposed to faster and hotter will give you different results. If you don’t care about the 18 minutes and just want a simple flatbread, you have lots of room to play here.
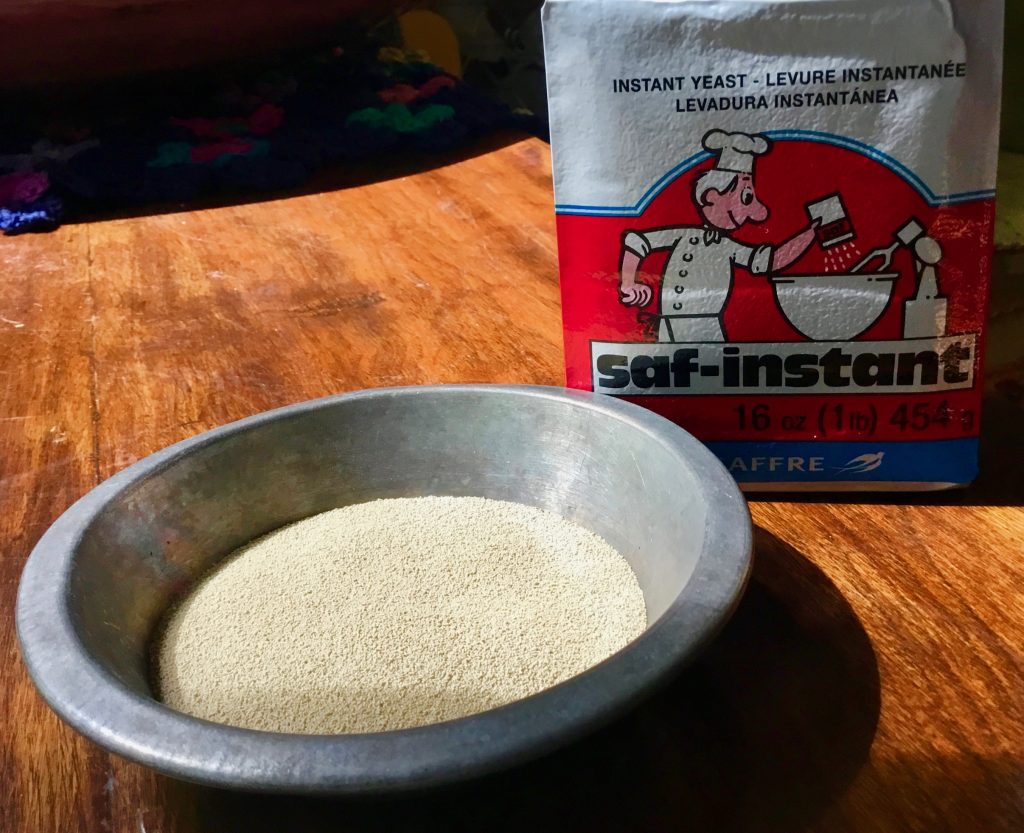
A friend called me this morning to ask a question about yeast. She is an experienced home baker, but, like many people, has always used Active Dry Yeast. Because so many people are baking while they are in lockdown, yeasts and flours are becoming hard to find. A mutual friend gave her some Instant Dry Yeast, but she wasn’t sure how to use it in place of the Active Dry yeast she it used to.
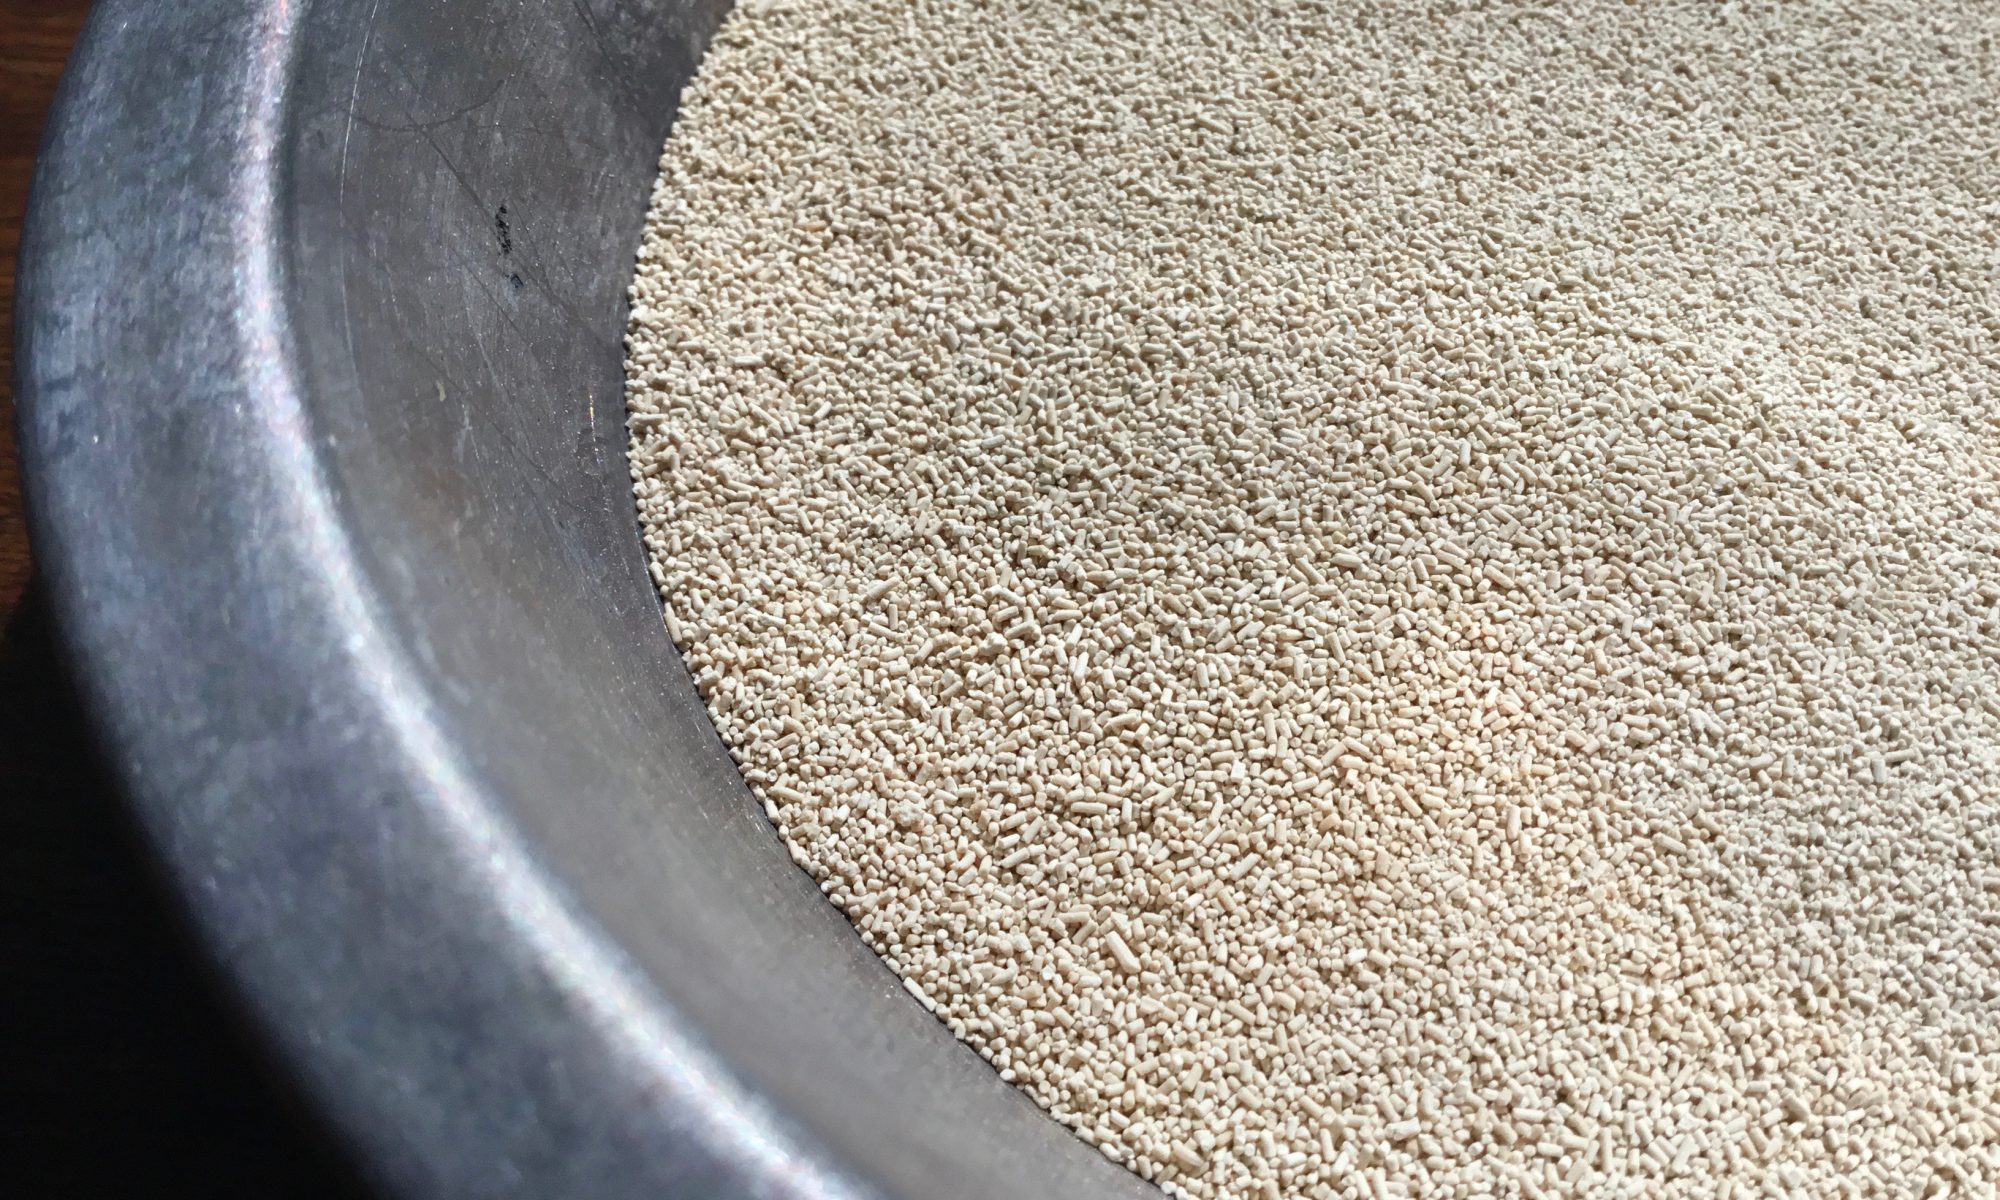
I thought (actually, my wife thought) other people might be in the same situation, so here’s a short explanation of some different kinds of yeasts you might have access to, and how to convert between them if you need to.
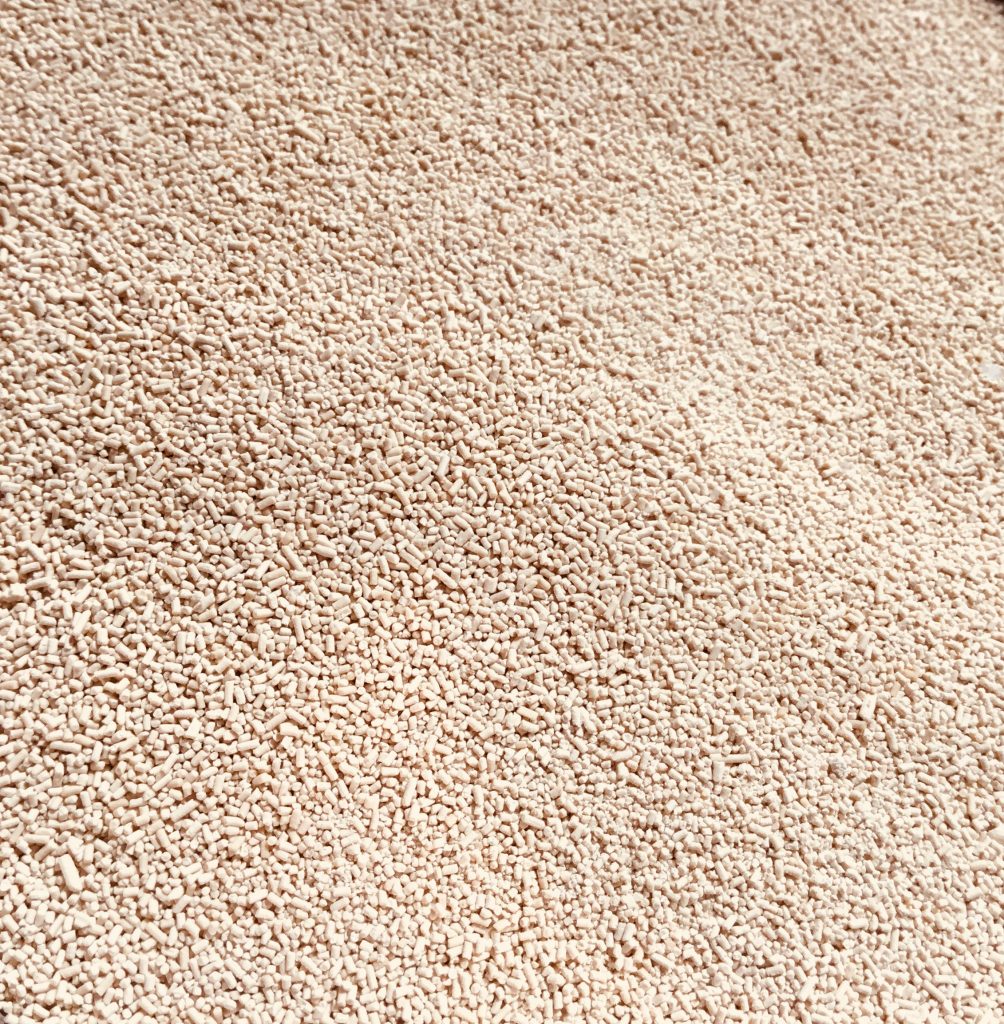
Instant Dry Yeast, up close and personal.
The main types of yeast that you are likely to run into are Active Dry Yeast, Instant Dry Yeast and Quick or Rapid Rise Yeast. Active Dry and Rapid Rise are the main kinds of yeast that you can purchase at the grocery store in the little packets that I always used to make a mess of when I tried to tear them apart.
The main difference between these is:
Active Dry Yeast is milled to a larger size than instant yeast. Therefore it needs to be dissolved in water before using. When I first learned to bake, long, long ago, this is what I used. Most home bakers proof the yeast before baking. Proofing is the process of dissolving the yeast in water with a little carbohydrate – usually sugar – dissolved in it, and then waiting until it bubbles to prove it’s alive.
Instant Dry Yeast is milled much more finely so that you can mix it directly into the flour and other dry ingredients, and then add the liquid ingredients and you’re good-to-go. There’s no need to proof it. I have read that instant yeast contains a higher percentage of live yeast than Active Dry. I’m not sure if this is true, but it certainly behaves as if it is. SAF Red instant dry yeast is the yeast that I use for almost everything, as does just about every professional baker I know.
Quick Rise or Rapid Rise Yeast are milled finely, like Instant Dry. They also have enzymes and other things added to turbo charge them with the idea of making your dough rise faster. As I understand it, you really can’t proof rapid rise yeast as this will make them much less effective.
Osmotolerant Yeast , the most common of which is SAF Gold, is specially designed to be more reliable when making breads with a high sugar content (more than 10% of the flour weight). I use it when making sweet challah, or croissants, or other sweet breads.
Which to use?
If you can, choose one you like and get to know it and use it for everything. If you’ve always used Active Dry yeast and know how it behaves, then there’s no reason not to continue using it. The yeast you know is almost always going to give you better results than the yeast you don’t know. When I’m using commercial yeast, I exclusively use SAF instant yeast.
Switching between Active Dry and Instant yeast I like to keep things simple, so I use the same amount of yeast no matter which I use. If I were using Active Dry I would expect it to take a little more time to rise than if I’m using Instant. There are so many things, primarily temperature, that determine when your dough is done rising I wouldn’t put a number on it, but just be ready for it to take a little bit longer.
If, for some reason that I can’t think of, you want things to take the same amount of time, you can find conversion tables, but that seems like a lot of trouble.
Of course, if you can’t find any commercial yeast, you can make a sourdough starter, as our ancestors have done for generations. I’ll put up a post soon about how to make and use your own starter.
I love matzah. My wife loves matzah too. in fact even our Beagle Winston loves matzah.
Is that strange?
How much do we love it?
There is a custom not to eat matzah for a period before Passover – from 1 to 30 days – so that when you first eat it at the Passover seder it’s with extra joy and excitement. In the Rubinstein household, the month before Passover when we don’t eat matzah feels like the deprivation of something essential and life-giving. However, like winter in Pittsburgh (where I grew up and went to college), where the first spring day when it’s warm enough to go outside in a t-shirt is so glorious that it almost makes it worth the way-too-many months of winter spent indoors worth it, the first bite of matzah at seder after not eating matzah for a month is so delicious that it’s worth the month of deprivation.
Though I can’t imagine it, some people think matzah is something to endure once a year at Passover, and then block from their minds until faced with it again next year. They think of it as a flat, white square that tastes like cardboard and constipates you for days. Sure, you can grind it up and make it into matzah balls, and almost everyone likes matzah balls…that is unless the only ones they have had are the hard, dry, sit-in-your-stomach-for-days kind. (Yes, it’s true, some people like their matzah balls this way, but that’s something for them to take up in therapy).
In terms of cooked matzah, at lest traditionally, the highest form is Matzo Brei. The lowest, if you care about my opinion, are those soggy sponge cakes served at passover. (I’m sure your bubbie’s was great. No need to write.)
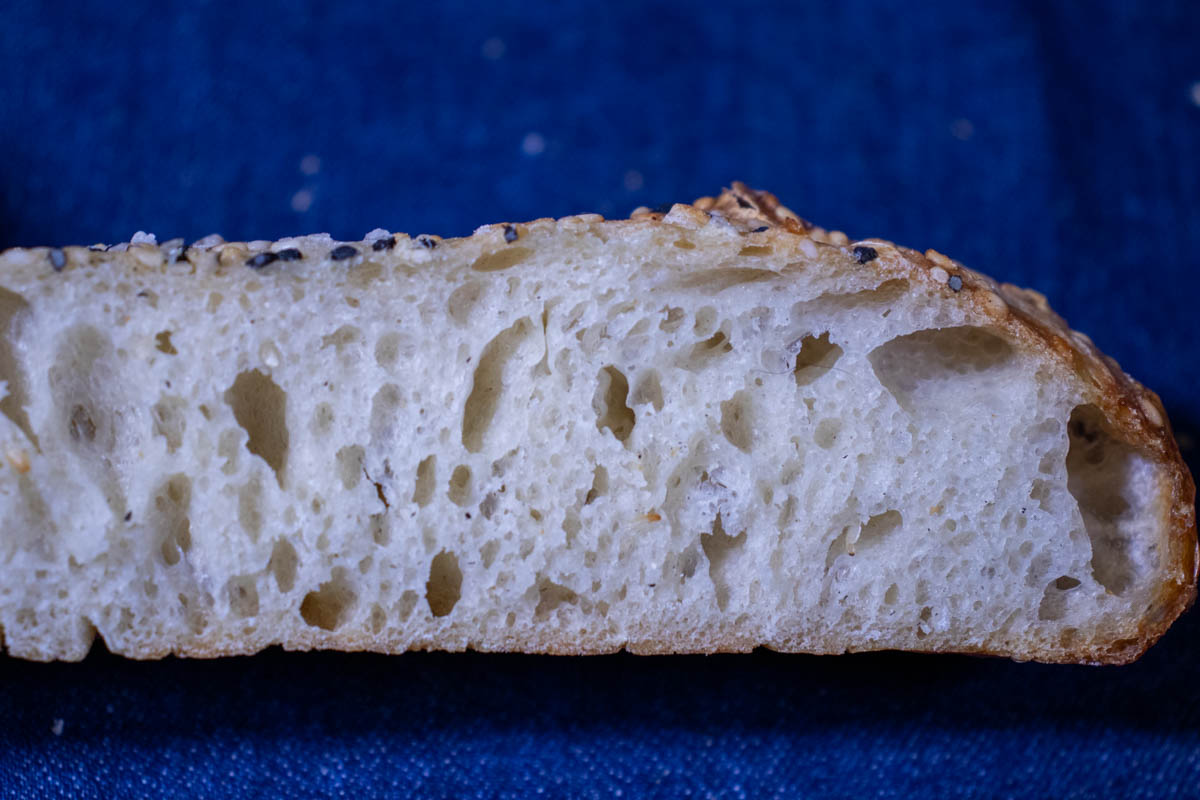
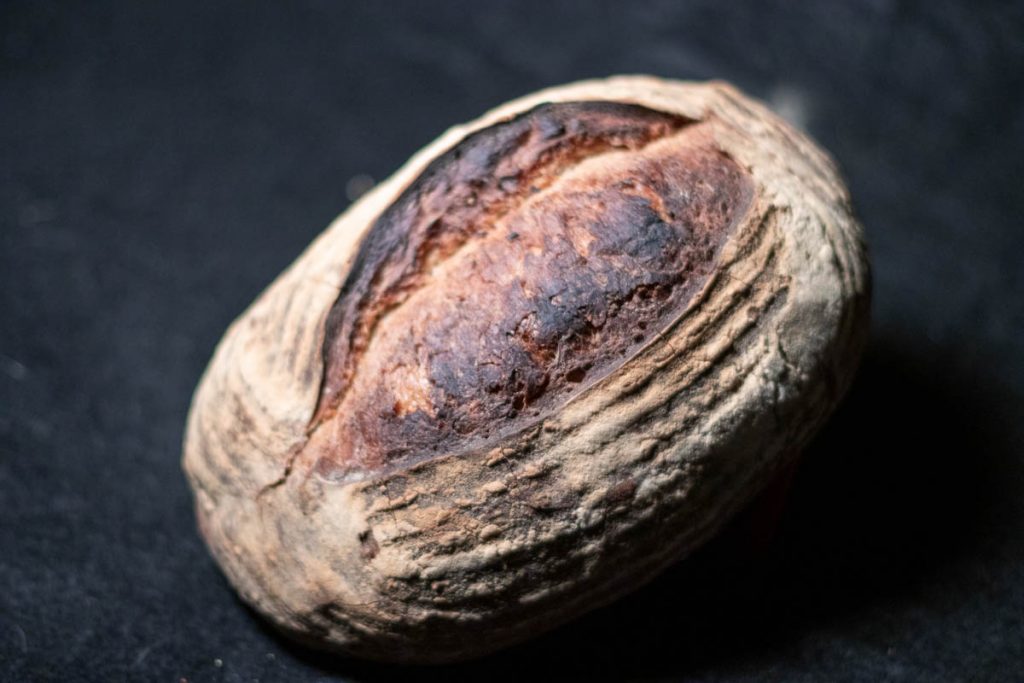
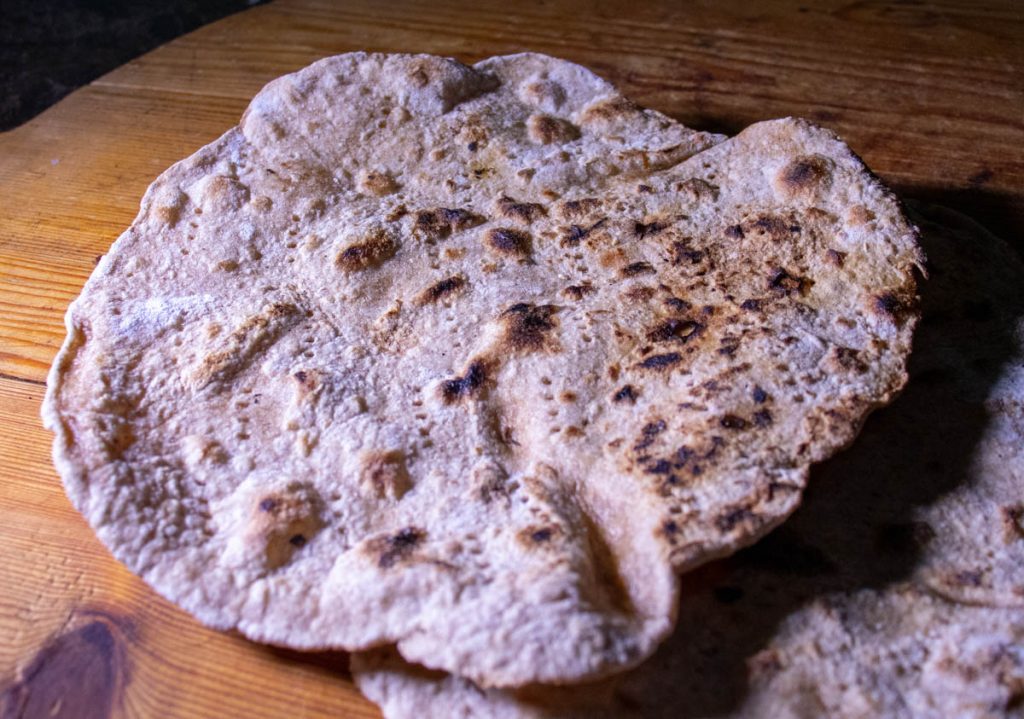
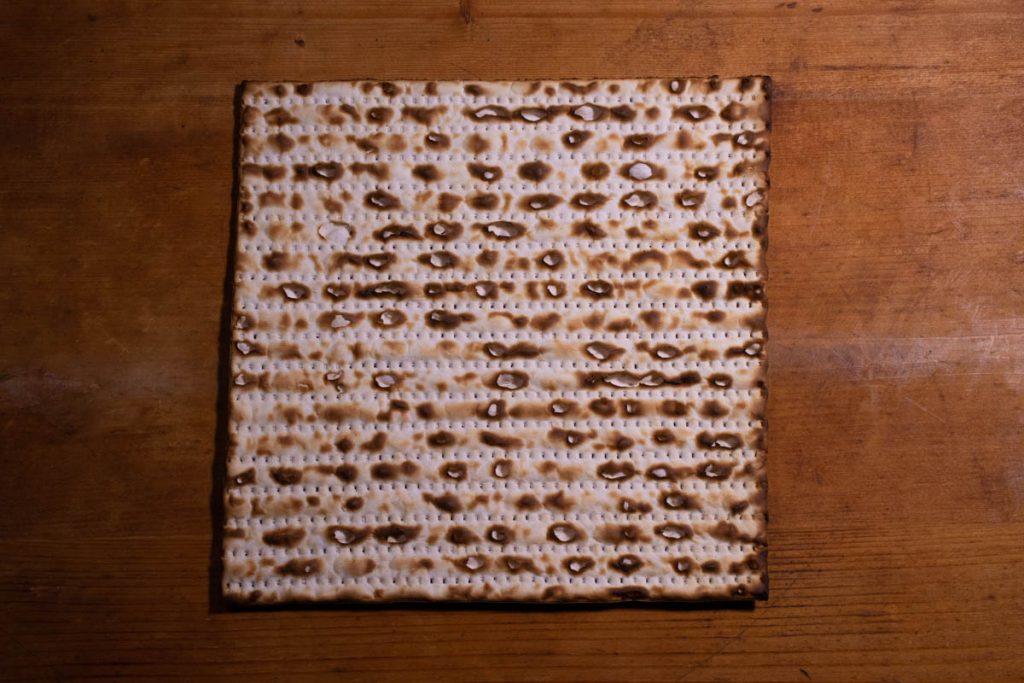
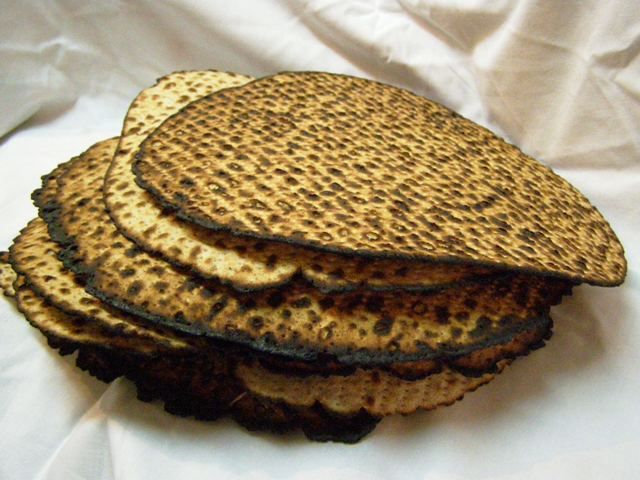
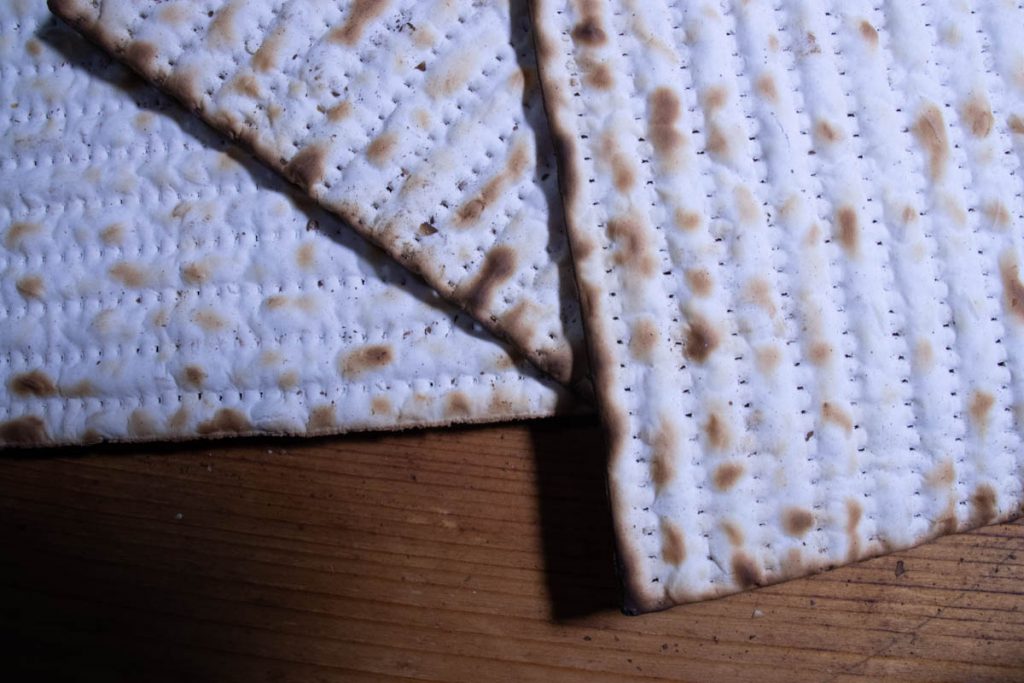
Did you know that not all matzah is white and square? Many people eat beautiful, hand-made, round, baked to a deep brown, shmura matzah. Other than being cracker-hard and dry, it shares few qualities with the square machine-made matzah that you are probably thinking about.
(Not my photograph)
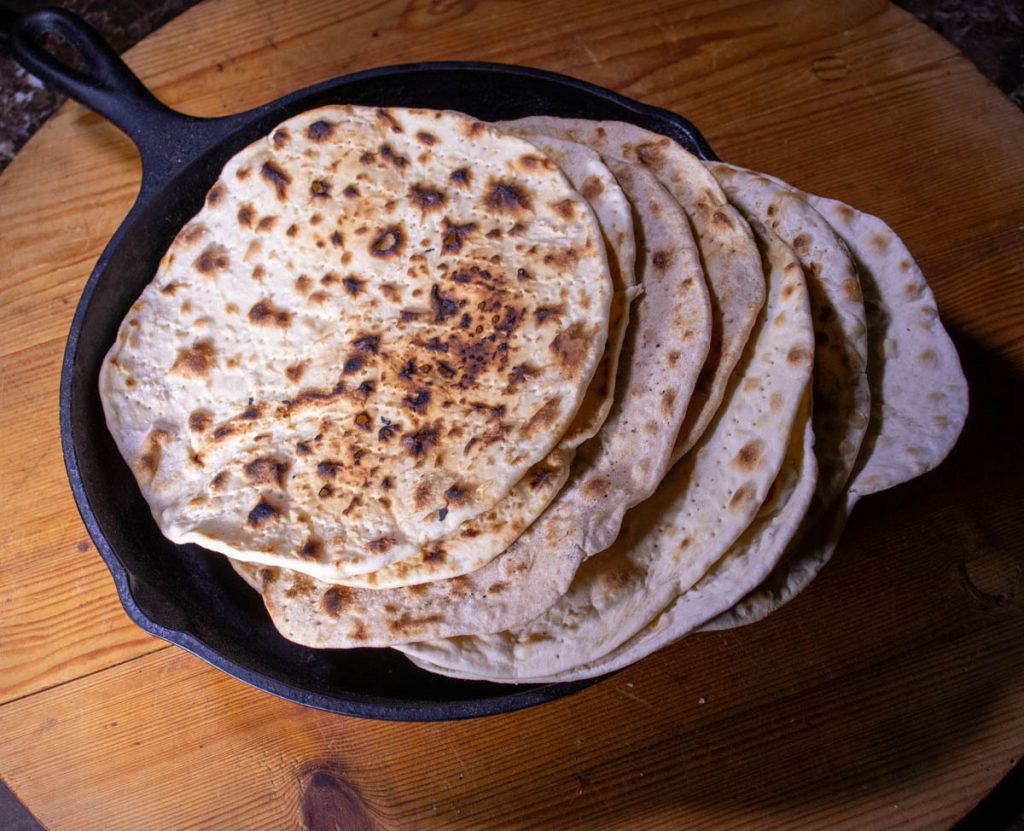
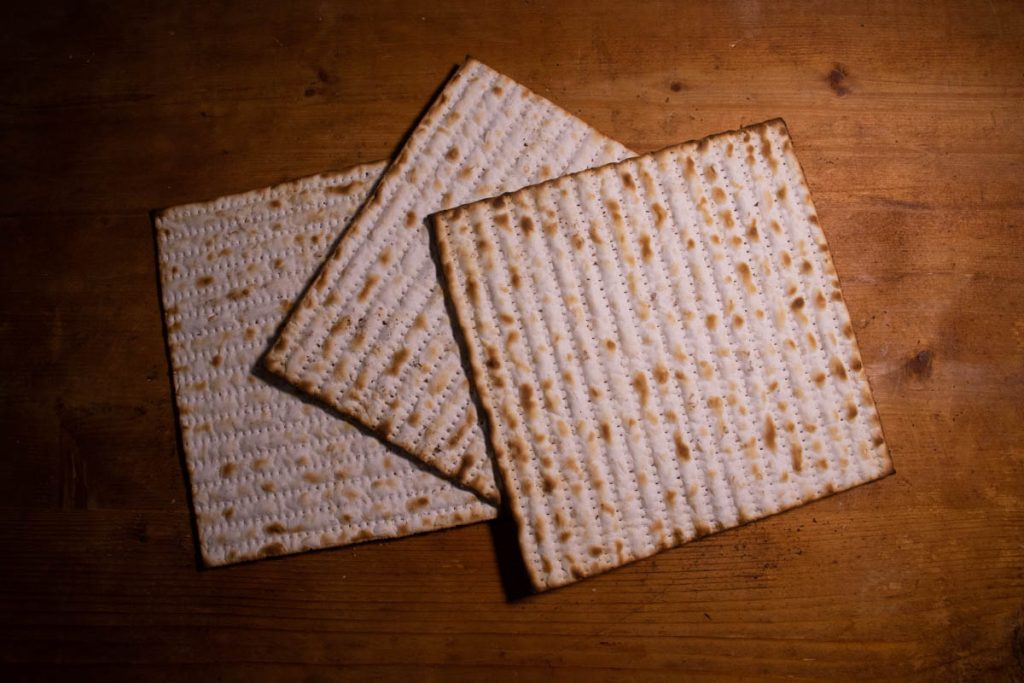
And here’s a shocker (to some people at least), it’s likely that the original matzah was probably not hard like a cracker, but was likely soft like a…well, like a middle eastern flatbread (which it is). In fact, there are still communities that eat soft matzah, and an increasing general acceptance that soft matzah is okay to eat at Passover.
Soft matzah. (Not my photograph).
I thought of writing about matzah during Passover, which just ended, but I never got around to it. Perhaps I was too busy eating matzah to write about it. As my beloved wife always says, you don’t want to spend more time talking about your relationship than you spend having it. The same thing is true of matzah, it seems: You shouldn’t spend more time writing about it than you spend eating it.
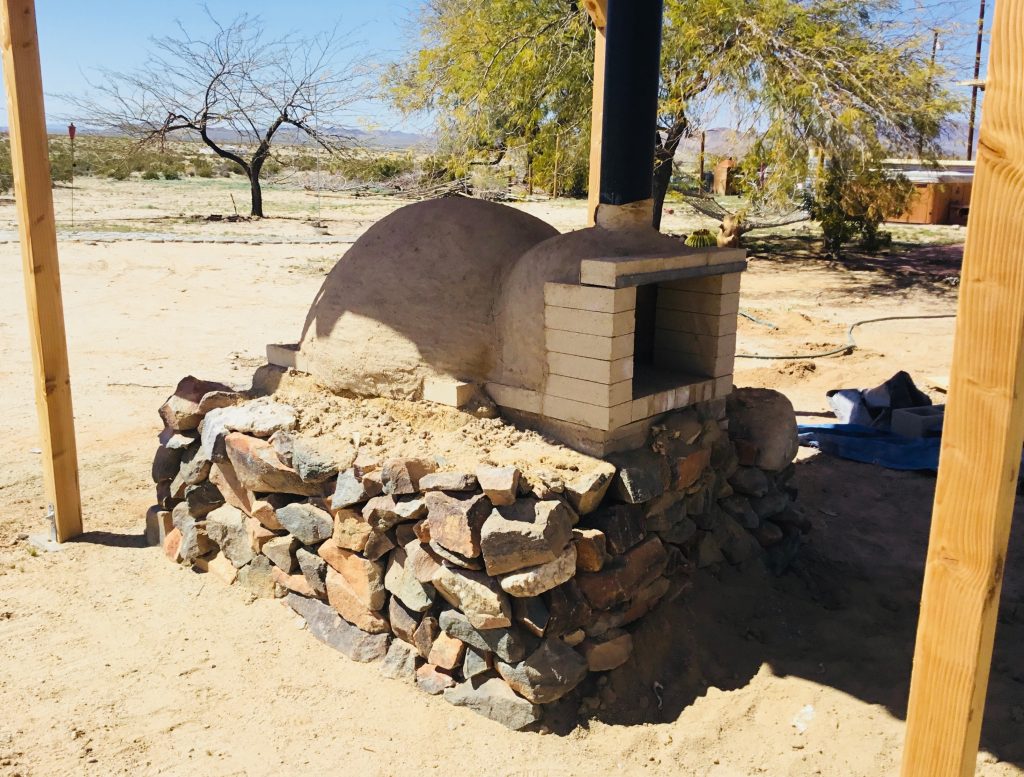
My hope this year was that I would finish building my new oven just in time to bake matzah in it for Passover, and that we would get to eat home baked matzah this year. (While not going into the Jewish law of matzah baking too much, I wouldn’t be able to use the oven that I used for baking bread throughout the year for making matzah for Passover). For many reasons, that didn’t happen. Truth be told, for other reasons of Jewish law that I won’t go into, I wasn’t sure that baking my own matzah was really that good of an idea anyway.
My new, but unfinished oven where I was planning on baking my Passover matzah this year.
But now that passover is over, I can bake all of the matzah I want. So, I invite you to follow me down this strange journey into the land of matzah, where miracles happen, and battle lines are drawn, and the Metamucil flows freely.
The plan is to do three posts: The history of Matzah, recipes for baking matzah, and finally recipes for using matzah.
I have a lot of friends who are at home right now, sheltering in place with their kids. (Don’t we all.) Some have expressed an interest in doing some bread baking, so, I thought I’d share a recipe for the first bread that I ever baked, which is both simple to make, and doesn’t require any fancy equipment, other than a couple of loaf pans and a bowl to mix in.
I baked my first loaf of bread when I was probably 19 years old. I was living in San Francisco and working cooking soup at a restaurant in the theater district. Walking home from work one day I stopped into a little bookstore on Geary near Taylor and bought my first bread baking book, “Baking Bread The Way Mom Taught Me”, by Mary Anne Gross. Miraculously, I still have my copy.
My original copyA well loved recipe
I don’t remember if I was specifically looking for a bread book, but I do know that I had recently become interested in bread baking when, along with other people from the restaurant, I went on a tour of a new bakery that was trying to solicit our business. Almost forty years later I still remember that amazing smell of fresh baked bread. I remember the huge walk-in refrigerators and proofers and ovens. (I’m not sure, in retrospect, that the ovens were really walk-in, but that is my recollection).
The bakers at this bakery had come over from France and told us about French baking techniques, and the difference between the French flour they imported for their bread, and flour from the U.S. To this day I remember their rolls, which we did end selling, which were soft and sweet on the inside, with a delicate, crispy crust that crackled when you bit into it. I think I lived on those rolls and lots of espresso for a couple of years.
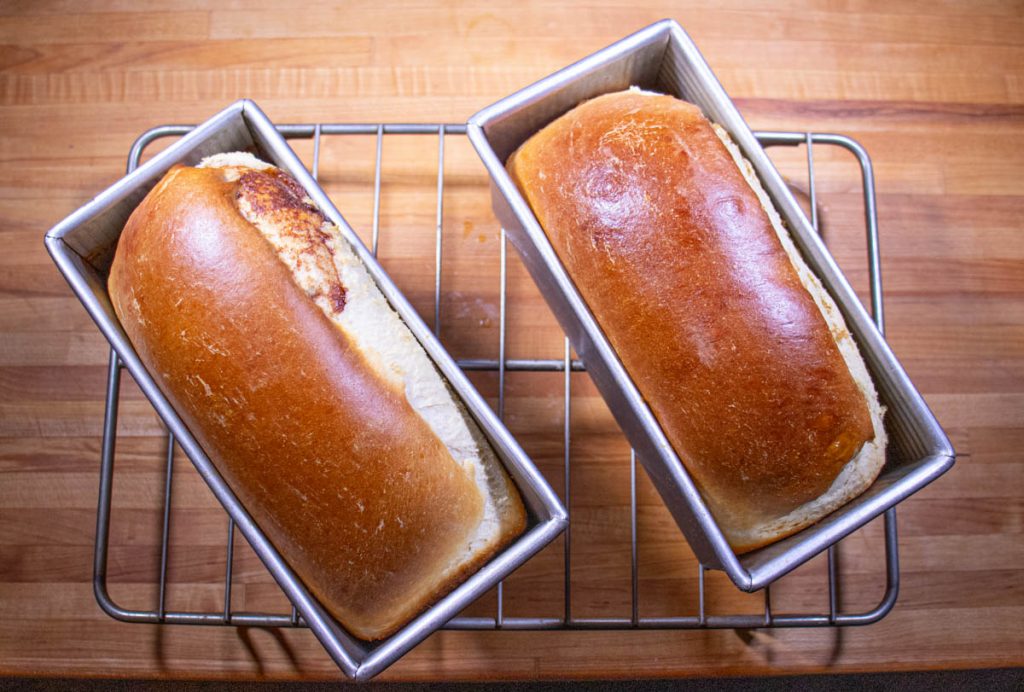
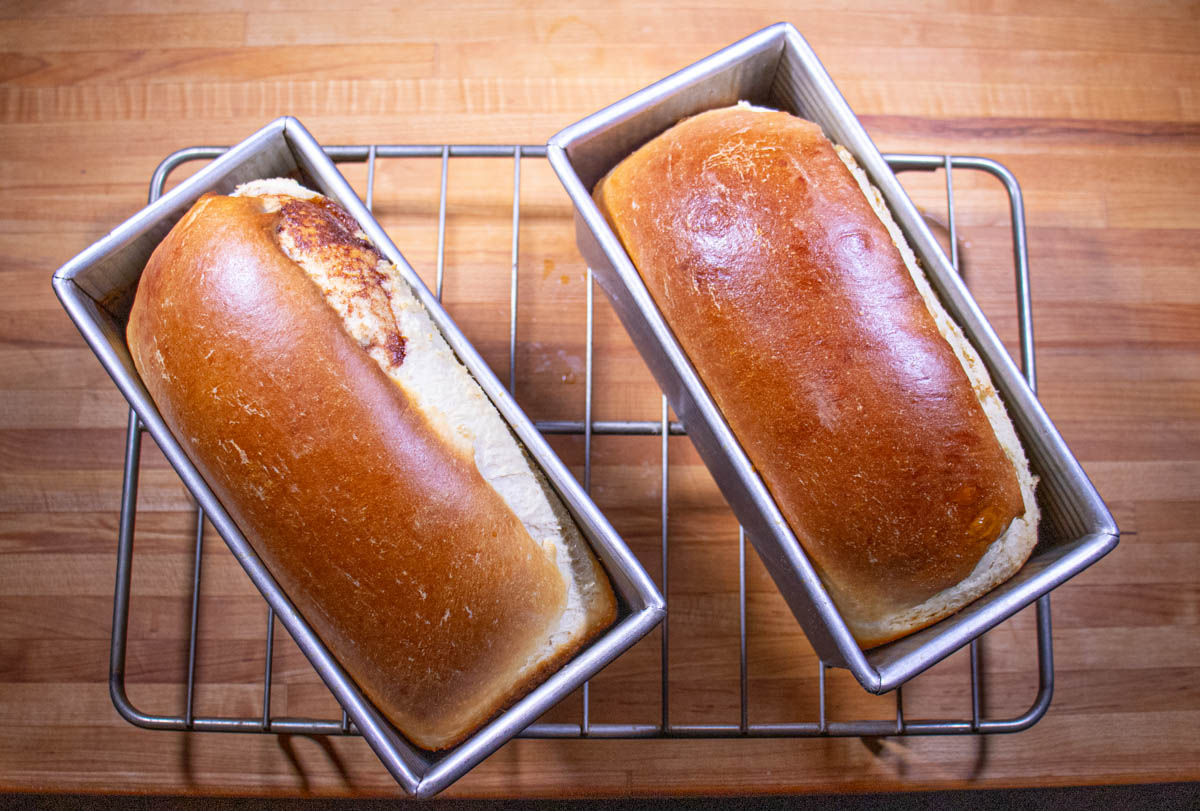
Fresh out of the oven
My interest in bread had been awoken, and when I walked out of that book store with a book about making bread I could feel the beginning of a new obsession…one that is still going strong after almost forty years.
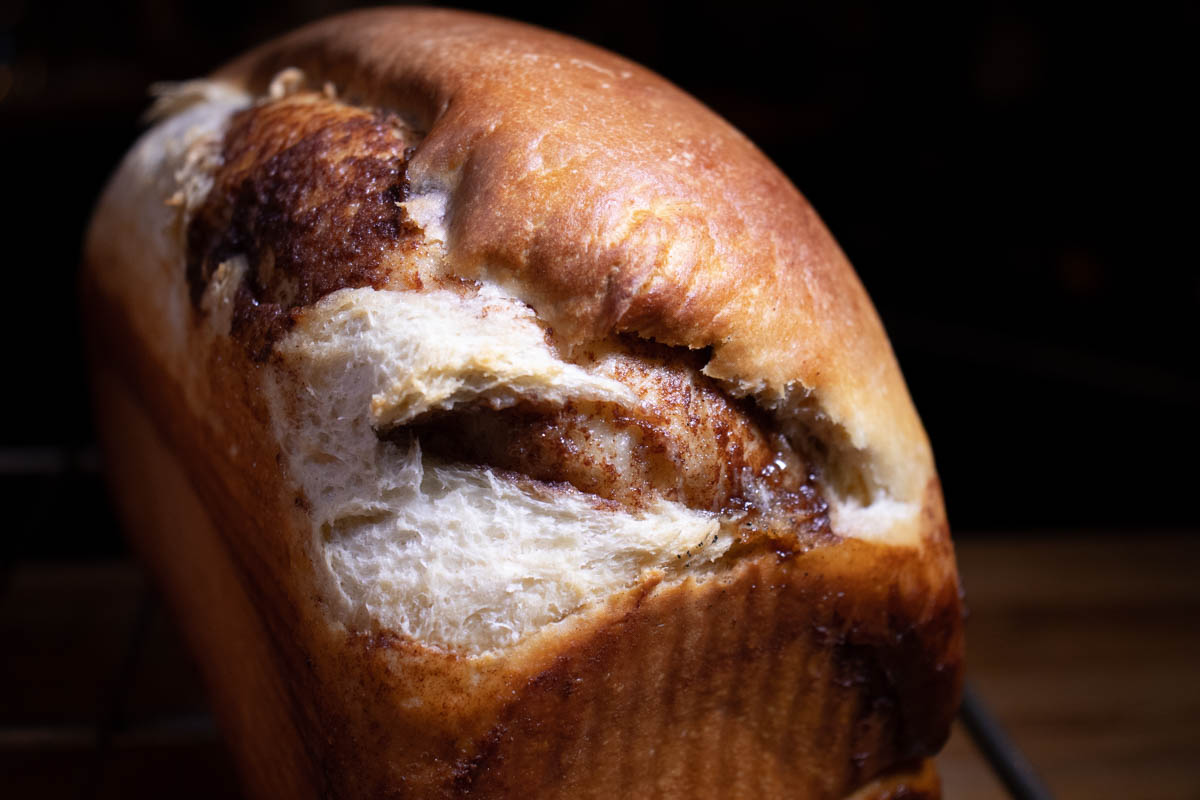
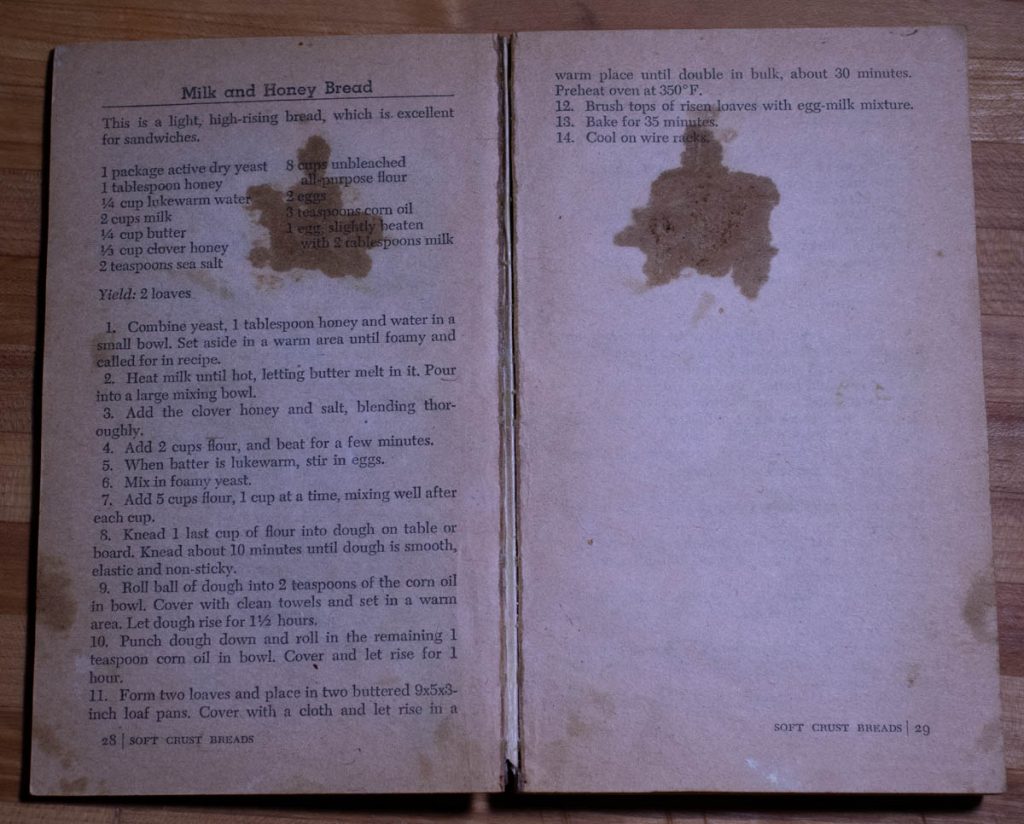
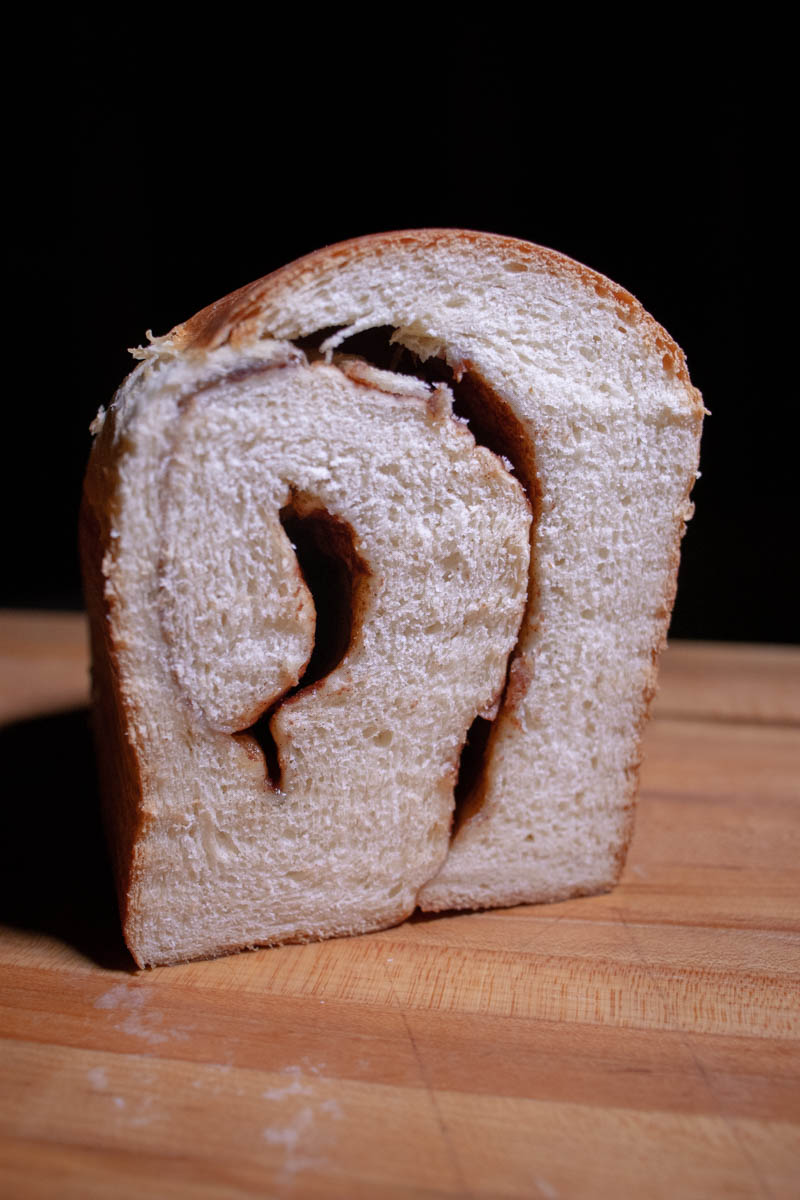
Being a completist I decided to start at the beginning and bake my way through the book. The first recipe is for “Milk and Honey Bread”, which for years was my go-to bread. It’s soft and sweet and delicious simply toasted with butter (or peanut butter) on it, or as the bread (read: most important) part of a sandwich. If you like cinnamon bread, you can also bake it with a swirl of butter and cinnamon sugar.
Don’t expect these loaves to survive for long.
Note: I’ve learned a lot about bread baking over the years, and first on the list is the importance of weighing your ingredients. However, back in the day we didn’t all have scales, we just used measuring cups and measuring spoons and the bread was still delicious. So, in the spirit of simplicity and beginning at the beginning, I’m sharing this recipe in its original format. Now that I’ve found this recipe again, I will at some point convert everything to weights and put up that version. But for now, a bake down memory lane.
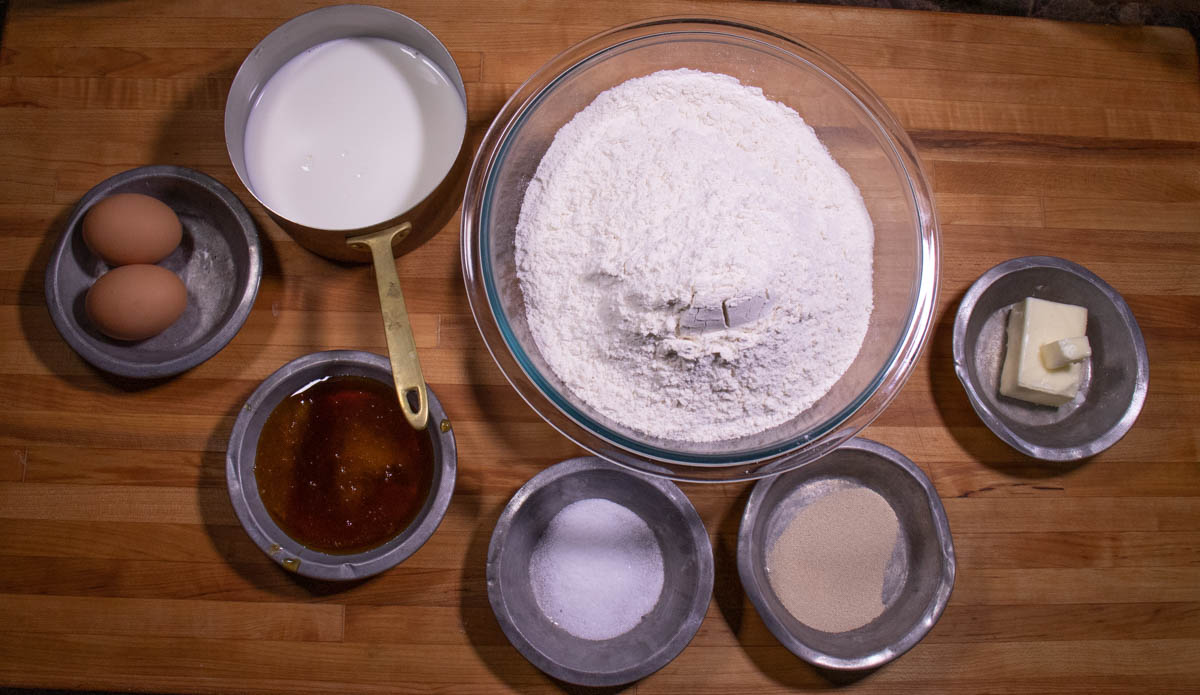
Milk and Honey Bread – Ingredients ready to go
Milk and Honey Bread based on a recipe by Mary Anne Gross
1 package instant yeast 1 Tablespoon Honey 1/4 C Lukewarm Water 2 C Whole Milk 1/4 C Butter 1/3 C Honey 2 teaspoons Sea Salt 8 C Unbleached All-Purpose Flour 2 Eggs 3 teaspoons oil (to oil bowl) 1 Egg slightly beaten with 2 Tablespoons Milk (to brush on before baking)
Yield: 2 loaves
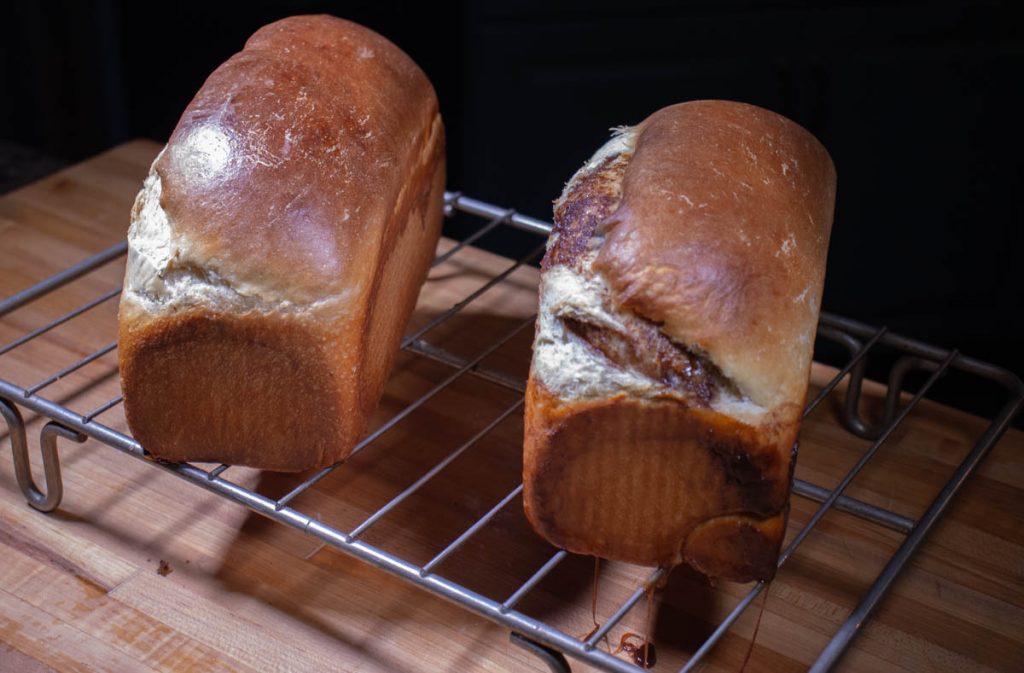
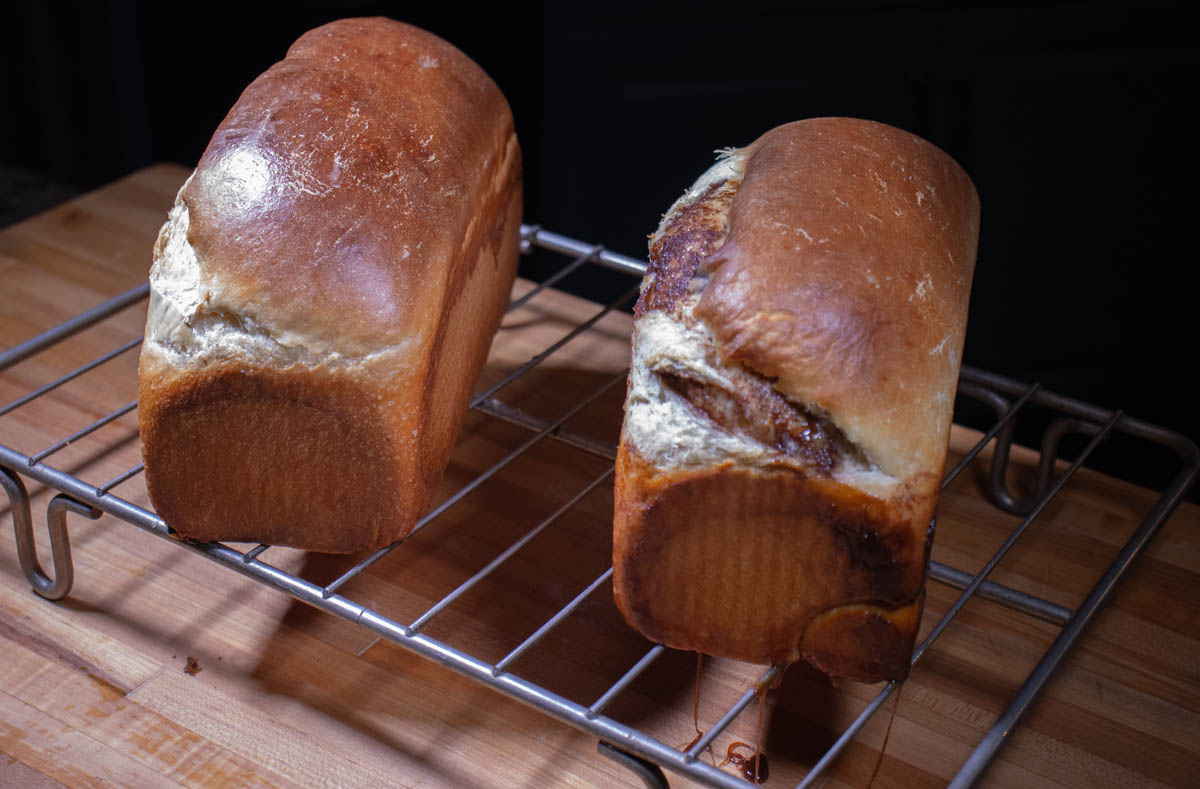
And out of the pans
Note: The original recipe uses active dry yeast and mixes the yeast with water and honey and waits for it to foam (proofing the yeast). I use instant yeast which you can mix directly into the dough without proofing it first. If you have active dry yeast, then proof it before adding it to the recipe.
Heat milk and butter over medium heat until butter is melted. Pour into large mixing bowl.
Add the honey, salt, and 2 cups of flour and beat for a few minutes.
When the mixture is lukewarm, stir in yeast and eggs.
Mix in 5 cups of flour, 1 cup at a time, mixing the flour in after each addition.
Knead for about 10 minutes until the dough is smooth, elastic and not sticky. Use the last cup of flour while you knead to keep the dough from being too sticky. You don’t need to add all of this last cup, just enough to get the proper texture. There’s a video link below on how to knead.
Make the dough into a neat ball and roll in 2 teaspoons of oil in the bowl that you are going to rise it in. Cover with a clean towel and let rise for 1 1/2 hours in a room that is not freezing cold or super hot (in the 70s).
Take the dough out of the bowl, topside down, and gently press it down into a circle, not so hard that you press out all of the air. Gather up the sides and make it back into a ball, roll in remaining 1 tsp of oil, and let rise for about 1 hour. It is done when you press a flour covered finger into the dough and it bounces back gently. If it bounces back too strong, it’s not done yet, if it doesn’t bounce back at all, it’s probably over-proofed.
Preheat the oven to 350.
Form two loaves and place them in buttered 9x5x3 inch loaf pans. Cover with a cloth and let rise for about 30 minutes. You can use the same test as above to test when they are ready to bake. (See video below about how to form loaves, if you want. Or just cut the dough into two equal pieces, roll them up into something that resembles a loaf, and put it in the buttered pan to rise.)
Brush the tops of the risen loaf with egg-milk mixture.
Bake for 35 minutes, until it’s nicely browned.
Cool on wire rack.
Here’s a video from King Arthur Flour about how to knead dough. There are a number of different techniques, so if you are bored you can search YouTube for bread kneading videos.
Here is a video from King Arthur Flour about how to shape and bake a basic white loaf.
Milk and Honey Bread – Ingredients ready to go
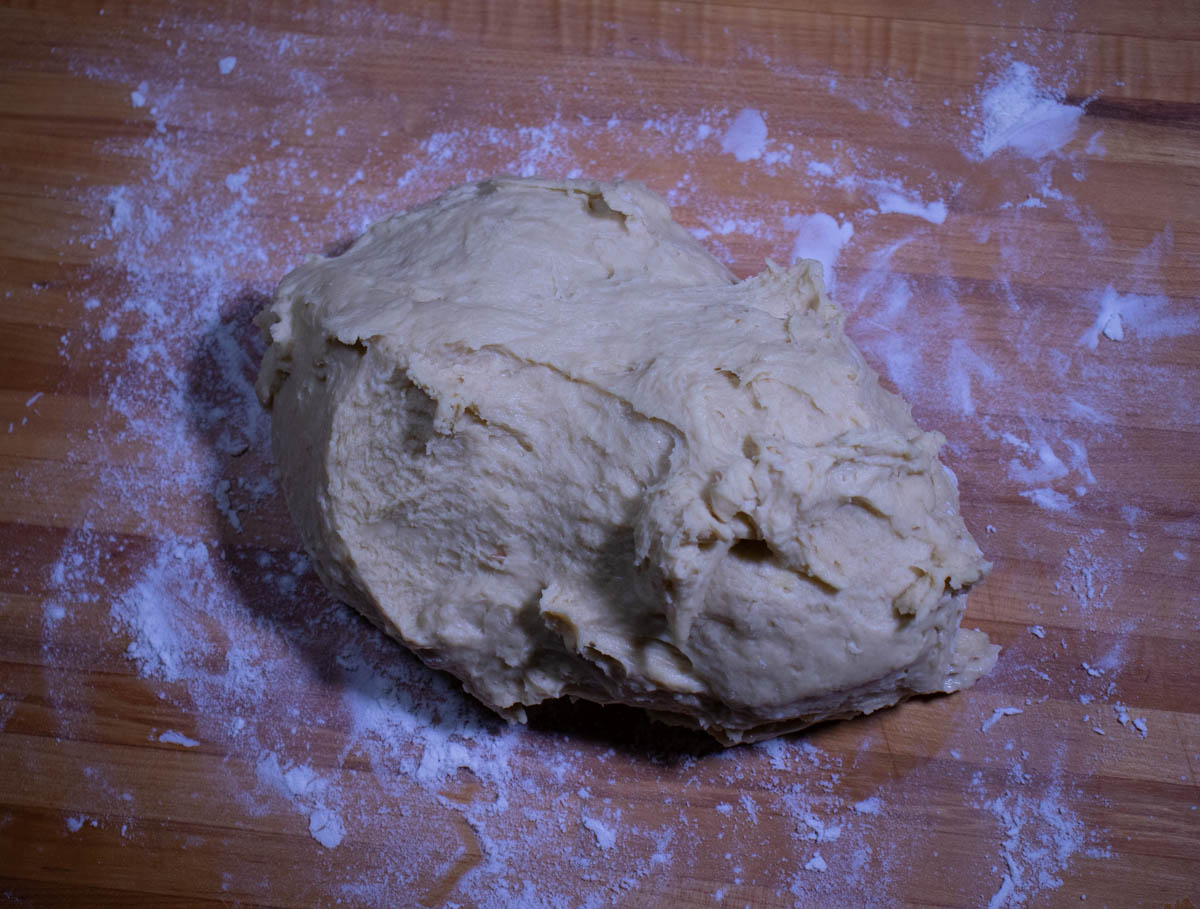
Mixed dough
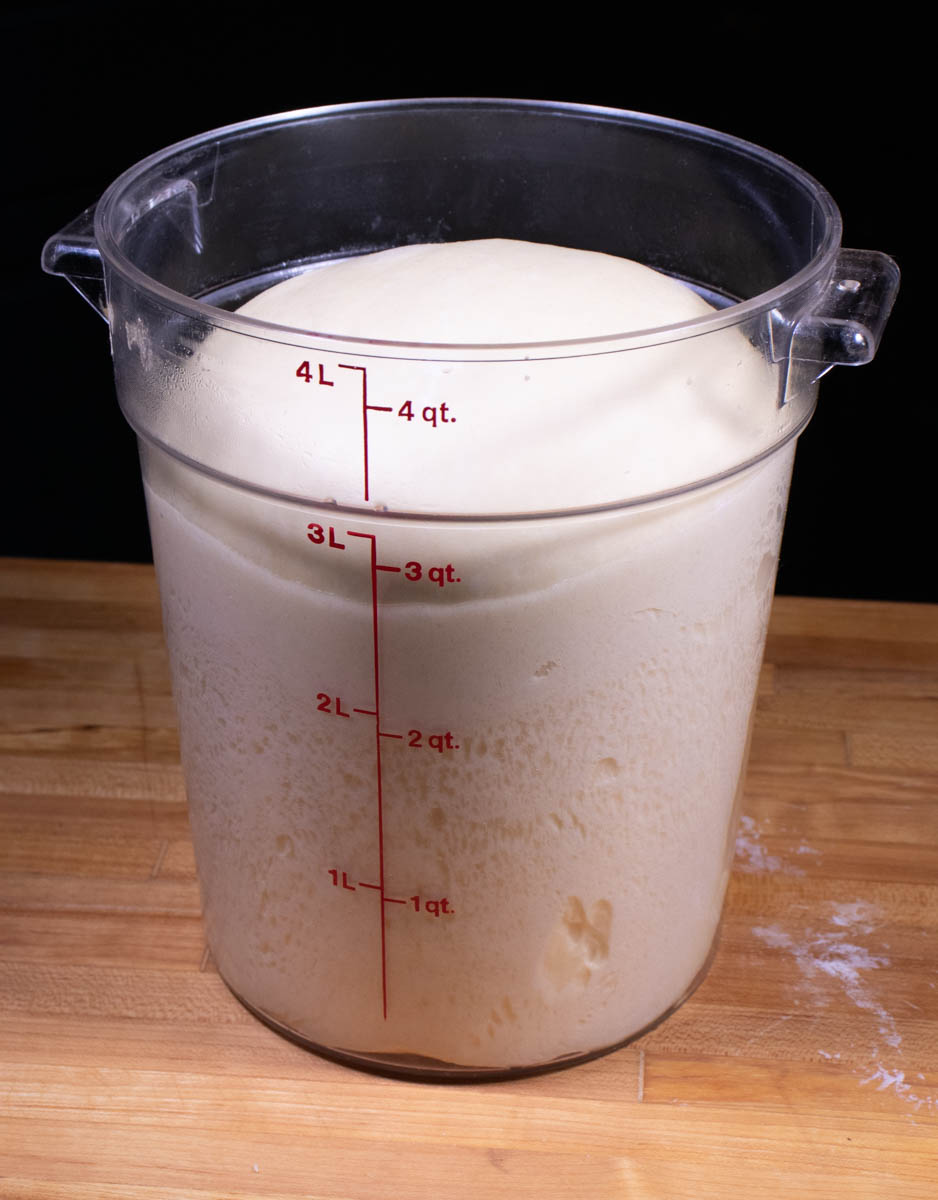
After 2 1/2 hours rising
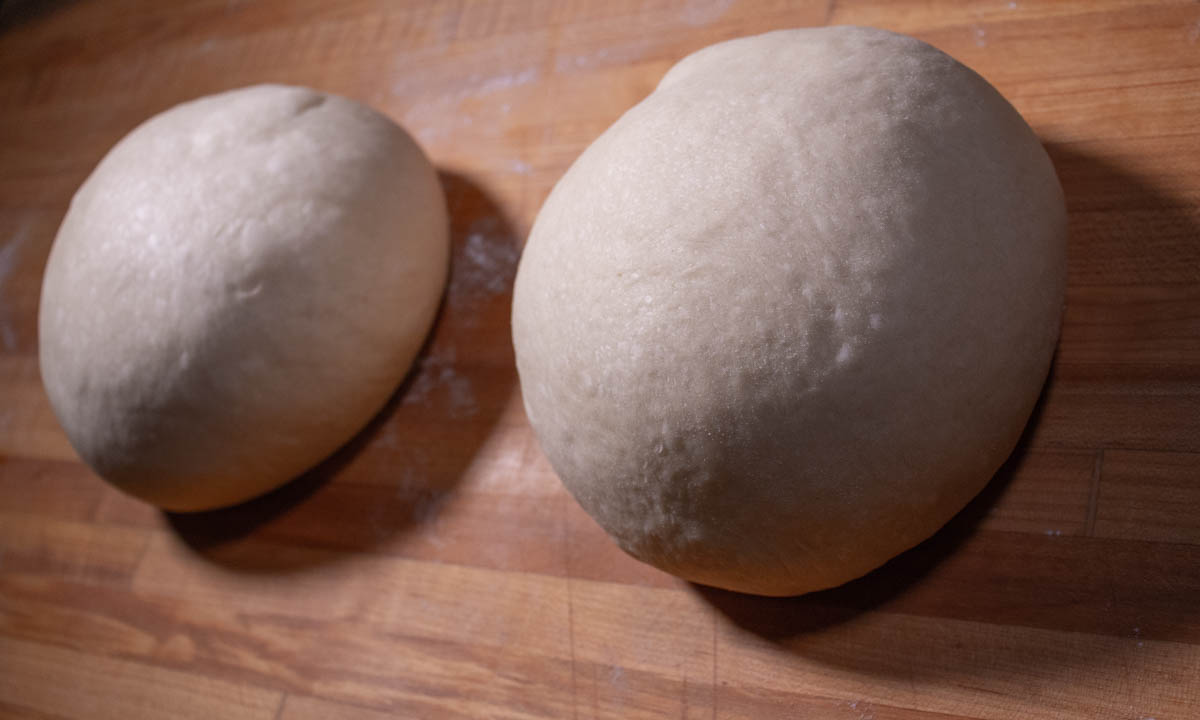
Pre-shaped dough
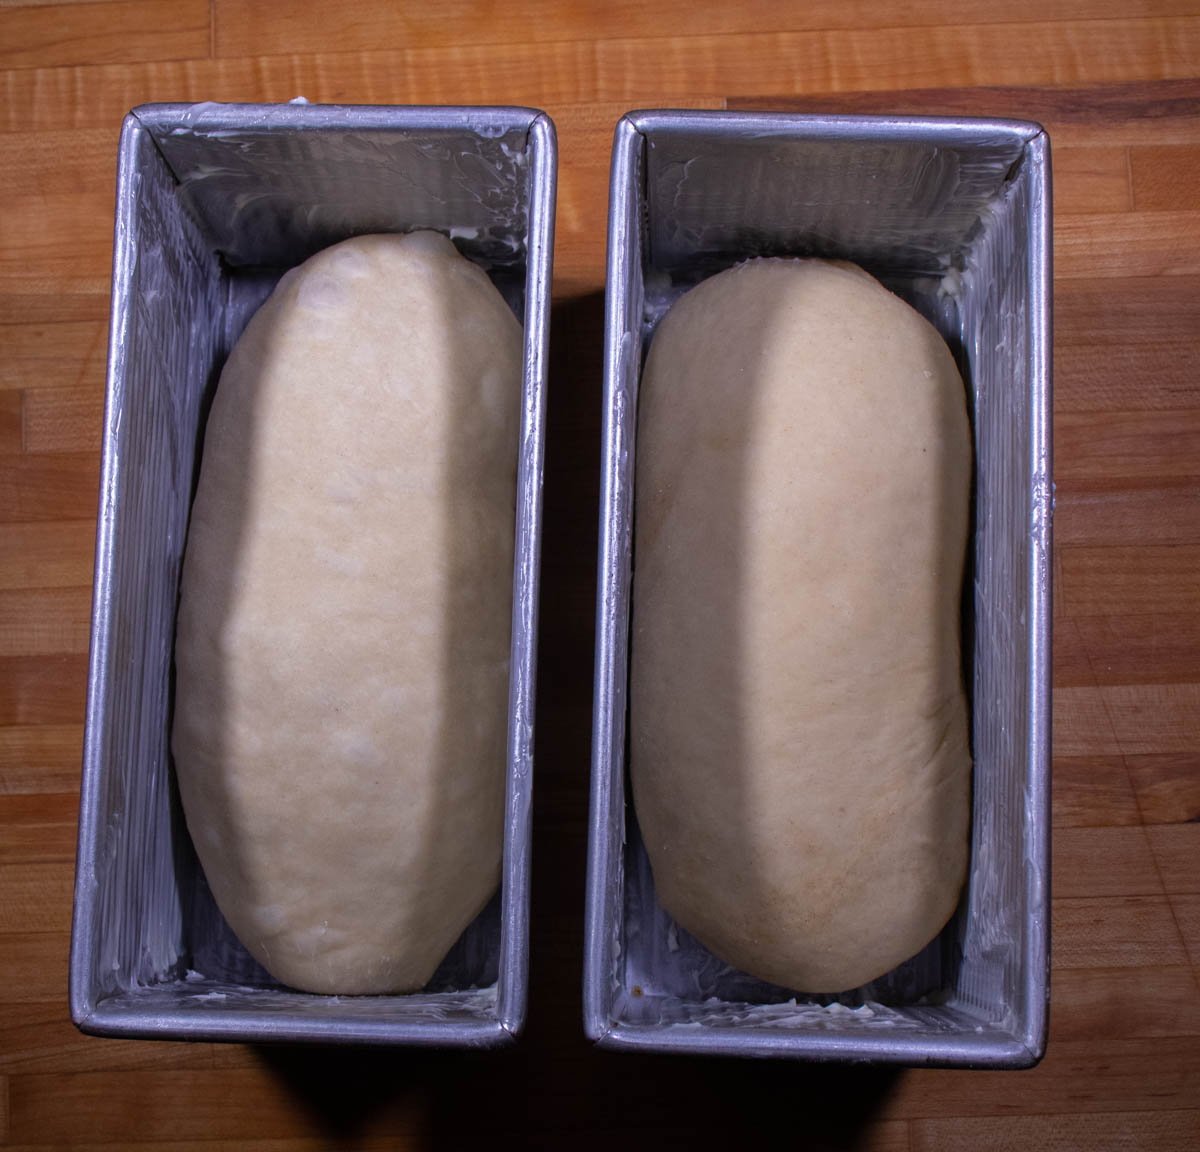
Shaped dough in the pans.
Fresh out of the oven
And out of the pans
With a cinnamon swirl
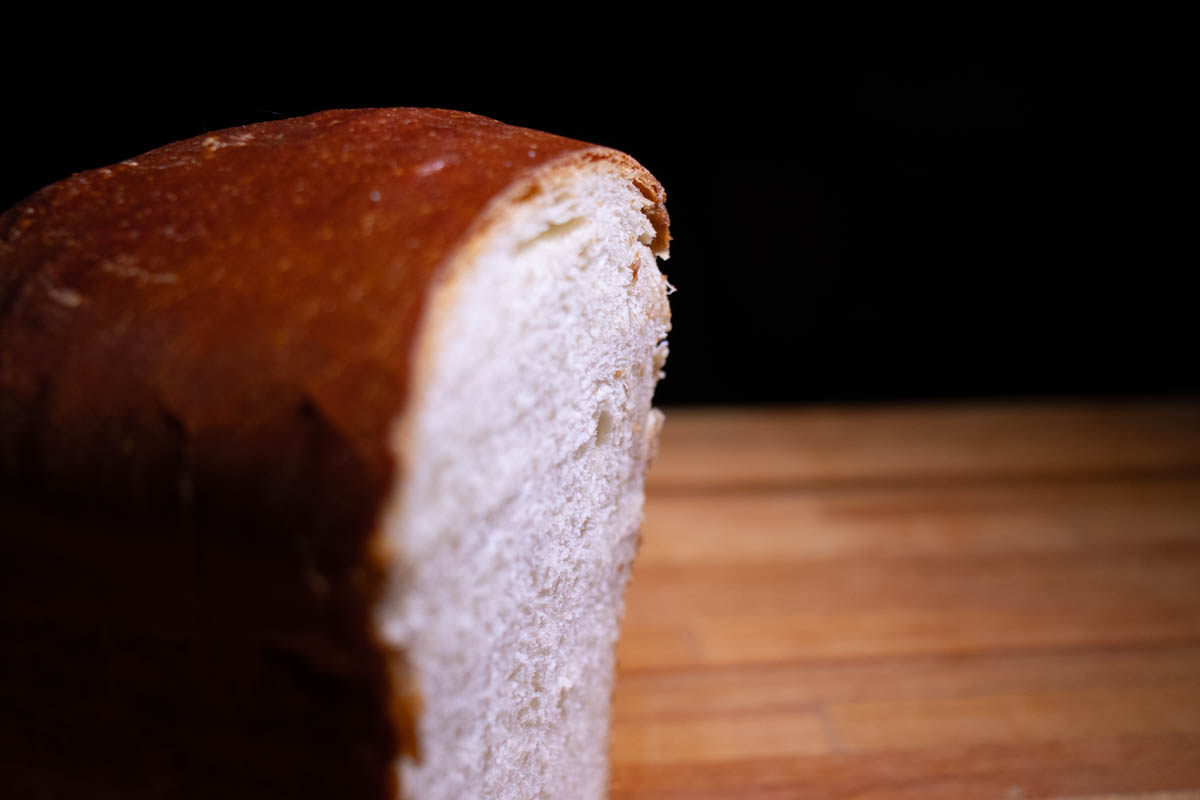
Milk and Honey Bread
I hope you enjoy this loaf as much as I did way back then…and – as he stuffs a slice of buttered toast in his mouth – as much as I am now.